
Hermitlux US-HDW5CW02
Hermitlux Countertop Dishwasher Instruction Manual
Model: US-HDW5CW02
Ro-ràdh
This manual provides essential information for the safe and efficient operation of your Hermitlux Countertop Dishwasher. Please read all instructions carefully before first use and retain this manual for future reference.

Ìomhaigh: Aghaidh view of the Hermitlux Countertop Dishwasher.
Suidhich
1. Fosgladh a’ bhogsa agus pàirtean
Carefully remove the dishwasher and all accessories from its packaging. Ensure all components listed below are present:
- Hermitlux Countertop Dishwasher
- Raca mias
- Cutlery Holder
- Pìob a-steach
- Pìob drain
- Pitcher uisge
- Leabhar-làimhe cleachdaiche

Image: Hermitlux Countertop Dishwasher with all included accessories laid out.
2. Greis
Place the dishwasher on a stable, level countertop near a water source and drain. The slim design (14.6 inches wide) is suitable for various kitchen layouts including U-shaped, L-shaped, or linear designs.
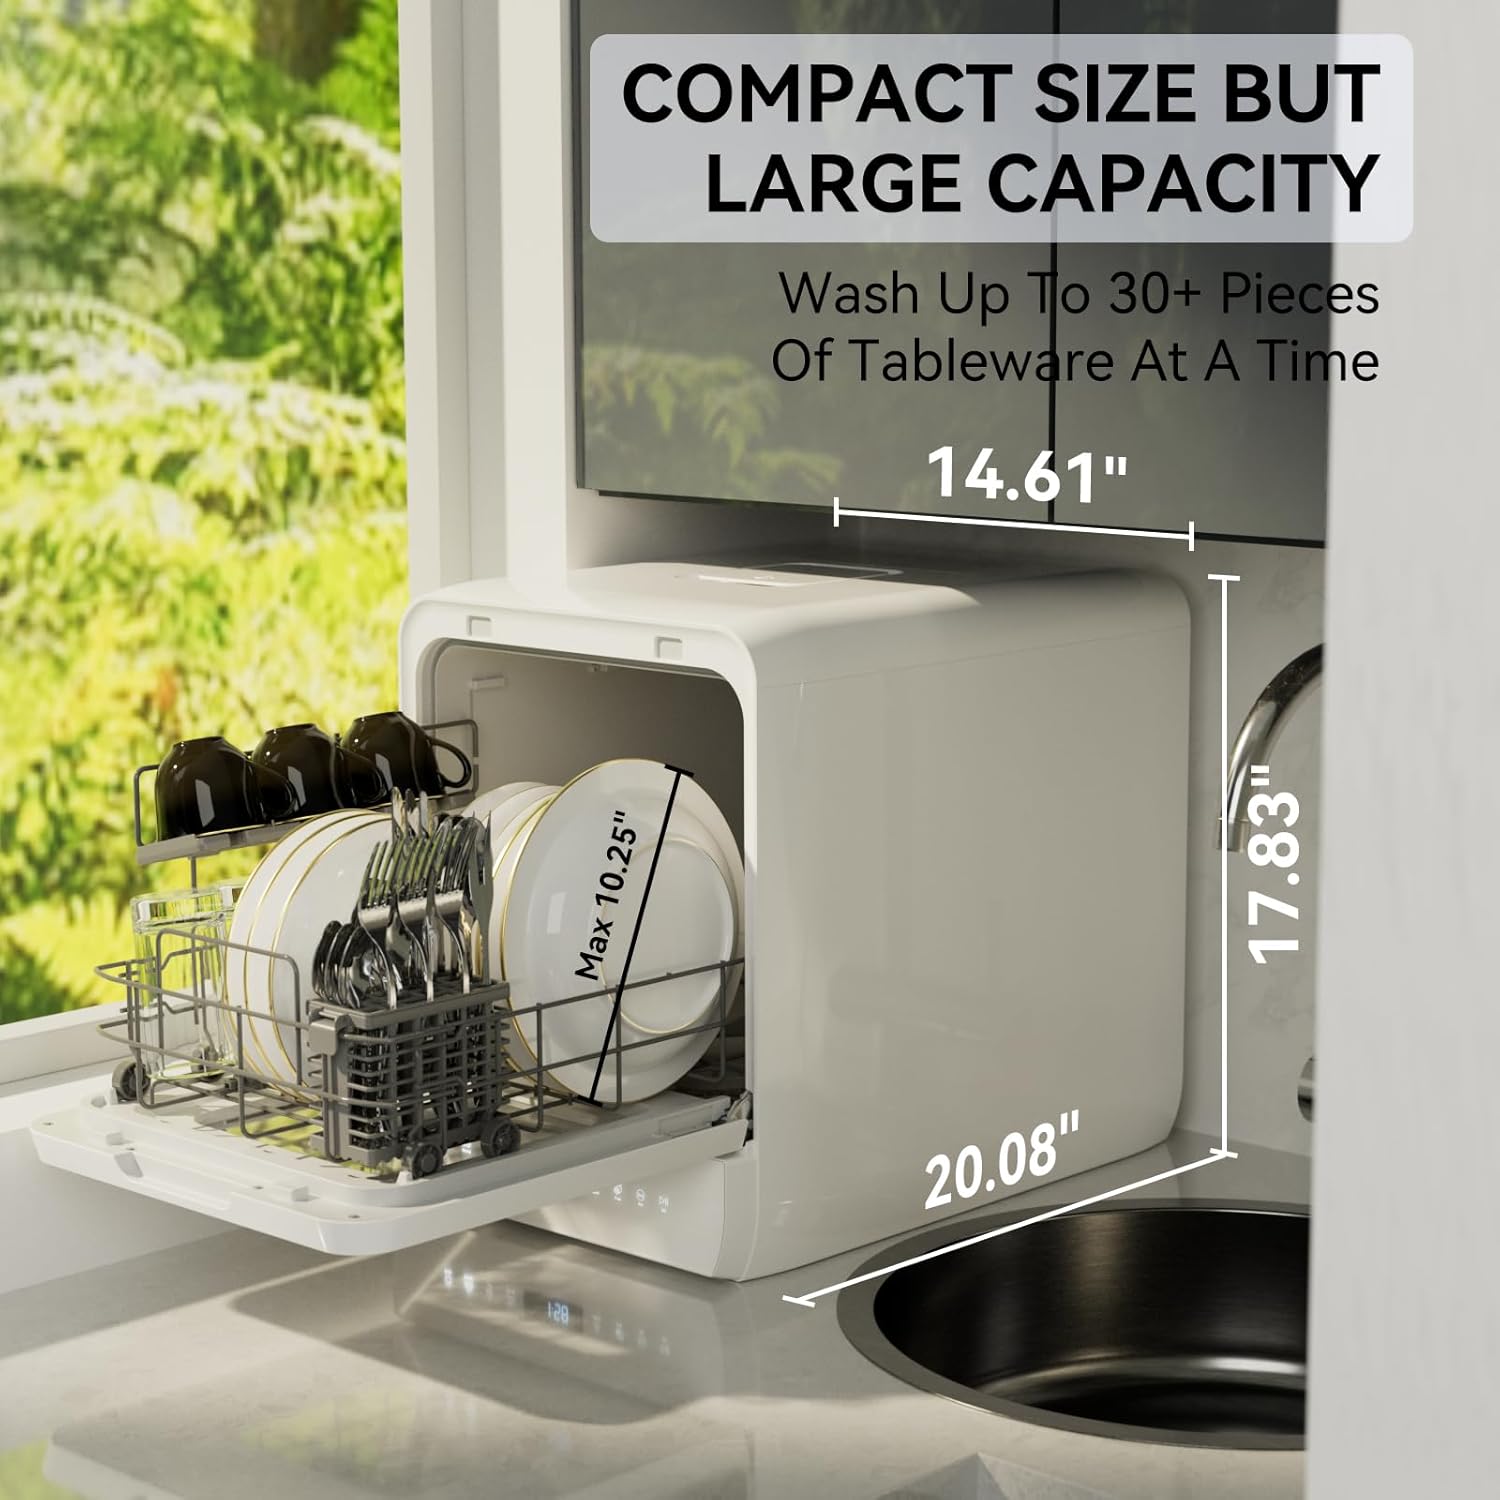
Image: Dimensions of the dishwasher (14.61" W x 20.08" D x 17.83" H) and suggested placement on a countertop next to a sink.
3. Ceangal Solar Uisge
Your dishwasher offers two methods for water supply:
- Manual Tank Fill: Open the water inlet cover on top of the unit and pour water using the provided pitcher until the dishwasher beeps, indicating the tank is full.
- Ceangal dìreach air an tap: Connect the inlet pipe to a kitchen faucet (G3/4" compatibility). Ensure the connection is secure to prevent leaks.

Image: Illustration showing both manual tank fill and direct faucet connection methods for water supply.
4. Drèanadh
Connect the drain pipe to the designated outlet on the back of the dishwasher. Route the drain pipe to a sink or a suitable drainage area. Ensure the drain hose is properly secured to prevent spills.
Stiùireadh Obrachaidh
1. Loading the Dishwasher Basket
Arrange dishes in the basket, ensuring they do not block the spray arms. The dishwasher can hold up to 5 full place settings and 10.25" dishes at an angle. The adjustable shelf creates extra space for taller items.

Image: Diagram illustrating optimal loading of dishes, cups, and cutlery in the dishwasher basket.
2. A 'cur inneal-glanaidh
Add the recommended amount of dishwasher detergent (powder or liquid) to the dispenser located inside the door. Do not use hand dish soap.
3. Control Panel and Wash Programs
The LED control panel allows selection of various wash programs:
- àbhaisteach: Standard wash for everyday dishes.
- ECO: Cearcall sàbhalaidh lùtha.
- Làidir: Airson stuthan a tha gu math salach.
- Luath: Quick wash for lightly soiled dishes.
- Measan: Dedicated program for washing fruits and vegetables.
- Super Strong: Enhanced cleaning for stubborn stains.
- tioram: An extra function for drying dishes and preventing odors.

Ìomhaigh: Tharview of the dishwasher's control panel displaying the 6 wash programs and 1 extra function (Dry).
4. A’ tòiseachadh cearcall
Press the Power button to turn on the dishwasher. Select your desired wash program. Press the Start/Pause button to begin the cycle. The dishwasher will beep when the water tank is full (if using manual fill).
5. Feartan sònraichte
- Dual Y-Head Spray Arms: Provide 360-degree coverage and enhanced cleaning with double spray nozzles.
- Modh tiormachaidh: Reaches up to 167°F to ensure dishes are dry and free from odors. A 72-hour keep-fresh mode can be activated after washing.
- Sàbhaladh uisge: Uses approximately 5L of water per cycle, saving up to 83% compared to handwashing.

Image: Diagram illustrating the dual Y-head spray arms providing cross-washing and multi-angle coverage.
Cumail suas
1. Glanadh an Filter
Regularly clean the food debris filter located at the bottom of the dishwasher. Twist and pull up the filter to remove it, rinse under running water, and reinsert securely.

Image: Close-up of the dishwasher's interior, highlighting the efficient food debris filter and G3/4" water inlet connection.
2. Cùram Coitcheann
Wipe down the interior and exterior of the dishwasher regularly with a damp cloth. Do not use abrasive cleaners. Ensure the air vent on the right side of the dishwasher is not blocked to prevent steam burns.
Fuasgladh thrioblaidean
- Chan eil an inneal-nigheadaireachd a’ tòiseachadh: Ensure the power cord is securely plugged in and the door is fully closed. Check if the water tank is filled or the inlet hose is properly connected.
- Soithichean nach eil glan: Verify that dishes are loaded correctly and not blocking spray arms. Ensure sufficient detergent is used. Select a stronger wash program if needed.
- Aodion uisge: Check all hose connections for tightness. Ensure the drain hose is properly positioned in the sink or drainage area.
- Còdan mearachd: Refer to the user manual for specific error code meanings and solutions.
Sònrachaidhean
| Feart | Sònrachadh |
|---|---|
| Modail Àireamh | US-HDW5CW02 |
| Meudan (D x W x H) | 20.08" x 14.61" x 17.83" |
| Cuideam nì | 33 not (15 cileagram) |
| Comas | 5 liotair (tanca uisge) |
| Voltage | 120 Volt |
| Caitheamh lùtha | 0.38 Kilowatt Uairean |
| Caitheamh uisge | 1.32 galan gach mionaid |
| Ìre fuaim | 50 Deicibeil |
| Prògraman nighe | 6 + 1 Dry Function |
| Feartan sònraichte | Compact, Portable, Slim-Size, Super Strong Washing Mode, Y-Head Spray Arms |
| Teisteanas | ETL |
Bhideothan Bathar Oifigeil
The following video provides additional guidance on using your Hermitlux Countertop Dishwasher:
Hermitlux Countertop Dishwasher, 6 Wash
Bhidio: Geàrr-chunntasview of the Hermitlux Countertop Dishwasher, highlighting its 6 wash programs. This video is a 7-second preview.
Barantas agus Taic
For warranty information or technical support, please refer to the contact details provided in your product's user manual or visit the official Hermitlux weblàrach.
Ask a question about this manual
Ask about setup, troubleshooting, compatibility, parts, safety, or missing instructions. Manuals+ will review the question and use this page’s manual context to help answer it.