
1. Ro-ràdh
This manual provides essential instructions for the safe and efficient operation, installation, and maintenance of your G21 Osmo 2200 W Reverse Osmosis System. Please read this manual thoroughly before using the appliance and retain it for future reference. This system is designed to provide purified and remineralized water with adjustable temperature settings.
2. Stiùireadh Sàbhailteachd
- Dèan cinnteach gu bheil an inneal air a chur air uachdar seasmhach, rèidh air falbh bho sholas dìreach na grèine agus bho thùsan teas.
- Na cuir an inneal, an càball cumhachd, no am pluga ann an uisge no leaghan eile.
- Keep out of reach of children. The appliance features a child safety lock, but supervision is always recommended.
- Use only potable water with this system.
- Thoir a-mach am pluga bhon inneal mus glan thu e no mus dèan thu obair-chàraidh sam bith.
- Do not operate the appliance if the power cord or plug is damaged. Contact qualified service personnel for repairs.
- Dèan cinnteach gu bheil fionnarachadh ceart timcheall an aonaid.
3. Toradh thallview
The G21 Osmo 2200 W Reverse Osmosis System is a countertop water purification unit featuring advanced filtration and instant heating capabilities.
Prìomh fheartan:
- Removes up to 99% of impurities from water.
- Provides clean, healthy, and great-tasting water.
- Filtration capacity of 7.8 liters per hour (LPH).
- Rapid 3-second heating function.
- Six adjustable temperature levels from 25°C to 95°C.
- User-friendly touchscreen display.
- Integrated child safety lock.
- Automatic filter change indicator.
- Reduces limescale, extending the lifespan of other appliances.
Co-phàirtean:


4. Suidhich
4.1 Fo-phacadh agus Suidheachadh:
- Thoir air falbh na pàirtean gu lèir bhon phacaid gu faiceallach.
- Place the main unit on a clean, dry, and stable countertop. Ensure there is adequate space around the unit for ventilation.
- Insert the drip tray into its designated slot at the front base of the unit.
4.2 Filter Installation:
- Open the filter compartment cover, usually located on the side or back of the unit.
- Identify the PAC, RO, and CF filters. Each filter is typically labeled.
- Insert each filter into its corresponding slot, twisting gently until securely locked. Refer to the markings on the unit for correct filter placement.
- Dùin còmhdach roinn an criathrag.
4.3 Initial Water Filling and Flushing:
- Thoir air falbh an tanca uisge bhon aonad.
- Fill the water tank with clean, potable tap water up to the 'MAX' line.
- Place the filled water tank back into the unit.
- Plug an sreang cumhachd a-steach do ionad dealain stèidhichte.
- The system will automatically begin an initial flushing cycle to prepare the filters. This process may take several minutes. Follow any on-screen prompts.
- Discard the water from the first few cycles as recommended by the system's display or until the water quality indicator shows optimal levels.
5. Stiùireadh Obrachaidh
5.1 Cumhachd air / dheth:
Press the 'Power' button on the touchscreen to turn the unit on or off.
5.2 Using the Touchscreen:
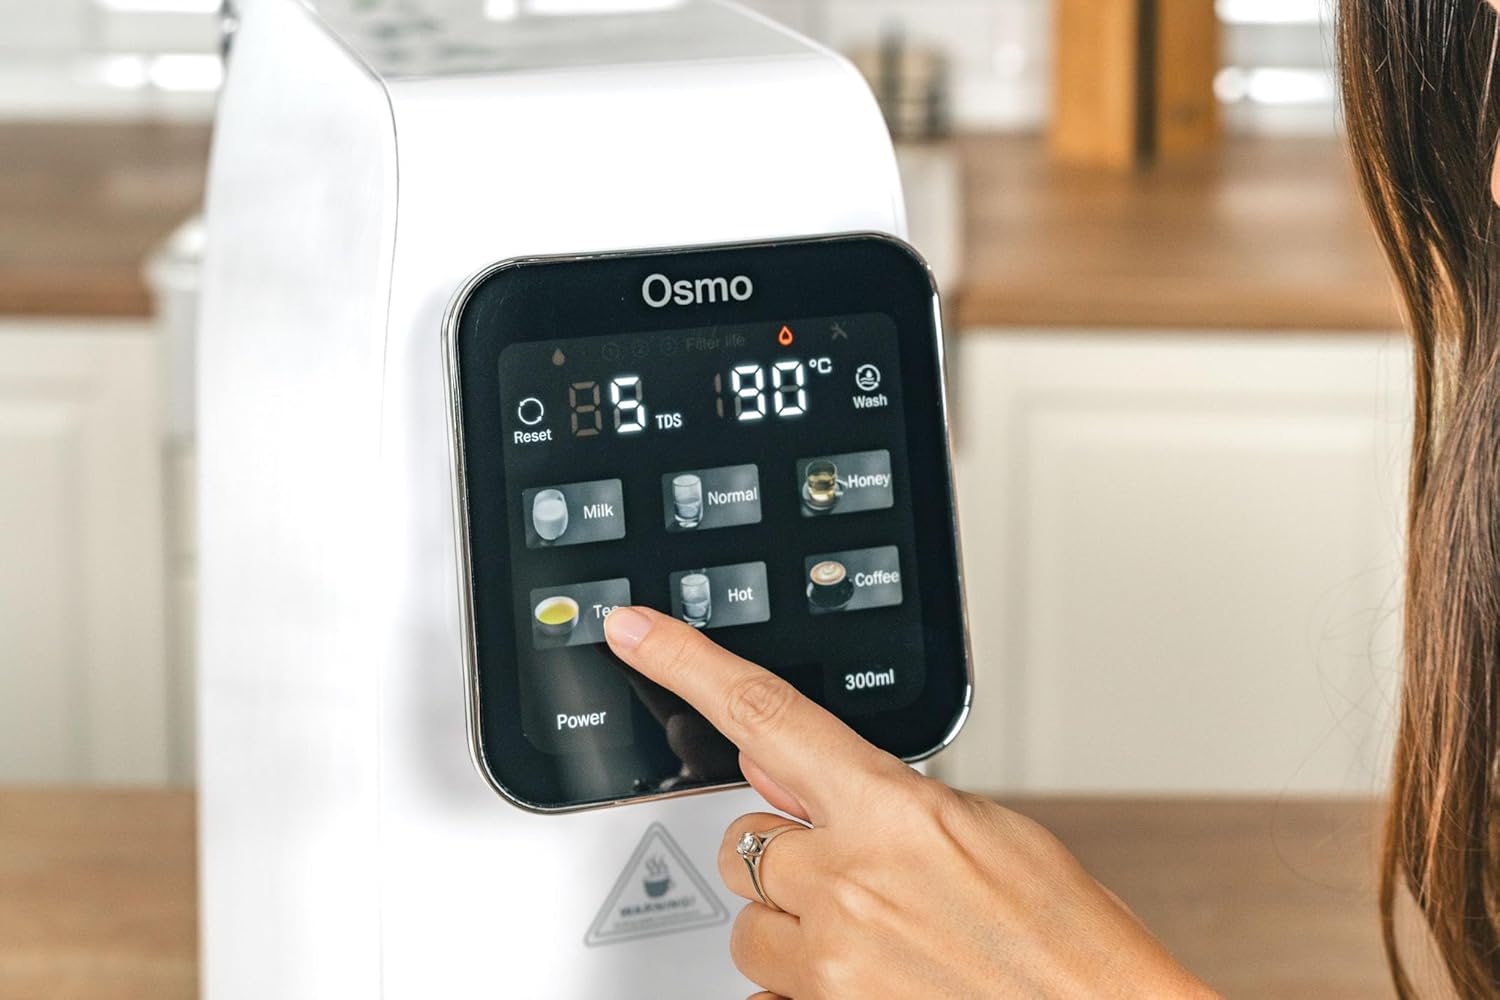
The intuitive touchscreen allows you to select desired water temperatures and dispense water.
5.3 Selecting Temperature Levels:
The system offers six temperature presets:
- àbhaisteach: Room temperature purified water.
- 25 ° C: Ideal for specific beverages or cooling.
- 45 ° C: Suitable for baby formula or warm drinks.
- 60 ° C: For certain teas or warm water needs.
- 80 ° C: Optimal for green tea.
- 95 ° C: Perfect for black tea, coffee, or instant noodles.
Tap the desired temperature icon on the touchscreen. The system will rapidly heat the water to the selected temperature.
5.4 Dispensing Water:
After selecting the temperature, place your cup or container under the dispenser nozzle. Press the dispense button (often labeled with a water drop icon or a volume, e.g., '300ml') to start dispensing. Press again to stop, or it will stop automatically after dispensing the preset volume.
5.5 Child Safety Lock:
To activate or deactivate the child safety lock, press and hold the designated lock icon on the touchscreen for a few seconds. This prevents accidental dispensing of hot water.
5.6 Filter Change Indicator:
The touchscreen display will show an indicator when a filter needs replacement. Refer to the maintenance section for filter replacement procedures.
6. Cumail suas
6.1 Cleaning the Unit:
- Thoir air falbh an inneal bhon ionad cumhachd.
- Sguab taobh a-muigh an aonaid le bog, damp aodach. Na cleachd luchd-glanaidh sgudail no solventan.
- Remove and empty the drip tray regularly. Clean it with mild soap and water, then rinse thoroughly and dry before reinserting.
- Clean the water tank with mild soap and water. Rinse thoroughly to remove all soap residue before refilling.
6.2 Ath-chur Criathar:
The system will indicate when filters need replacement. Typically, PAC and CF filters require more frequent replacement than the RO filter. Always use genuine G21 replacement filters.
- Unplug an inneal.
- Fosgail còmhdach roinn an criathrag.
- Twist the old filter counter-clockwise to unlock and remove it.
- Insert the new filter into the slot, aligning the markings, and twist clockwise to lock it in place.
- Dùin còmhdach roinn an criathrag.
- Plug in the appliance and perform a flushing cycle as per initial setup instructions to prime the new filter.
7. A ’dèanamh trioblaid
- Gun chumhachd: Dèan cinnteach gu bheil an càball cumhachd ceangailte gu tèarainte ri socaid obrach. Thoir sùil air an inneal-brisidh cuairte.
- Gun sgaoileadh uisge: Check if the water tank is properly installed and filled. Ensure the child safety lock is not activated.
- Sruthadh Uisge Mall: This may indicate clogged filters. Check the filter change indicator and replace filters if necessary.
- Blas/fàileadh neo-àbhaisteach: Perform a flushing cycle. If the issue persists, replace the filters.
- Còdan mearachd: Refer to the specific error code displayed on the touchscreen and consult the G21 support weblàrach-lìn no cuir fios gu seirbheis teachdaiche airson cuideachadh.
8. Sònrachaidhean
| Feart | Sònrachadh |
|---|---|
| Ainm Modail | CISV-G21-RO |
| Brand | G21 |
| Meudan (L x W x H) | 39 x 20 x 45 cm |
| Cuideam | 9.5 cileagram |
| Stuth | Polymer |
| Modh glanaidh | Osmosis air ais |
| Comas | 7.8 LPH (Liters Per Hour) |
| Ìrean Teòthachd | 25°C, 45°C, 60°C, 80°C, 95°C, Normal |
| Stòr cumhachd | Càball dealain |
| Seòrsa stàlaidh | Countertop |
| Feartan sònraichte | Remineralization, Touchscreen, Child Safety, PAC/RO/CF Filters |
9. Barantas agus Taic
For warranty information, technical support, or to purchase replacement parts and filters, please refer to the documentation included with your product or visit the official G21 weblàrach. Cùm do chuidhteas ceannach mar dhearbhadh ceannach airson tagraidhean barantais.