pamo LAS 3
pamo Industrial Design Garment Rack - LAS 3 Black Instruction Manual
Model: LAS 3 | Brand: pamo
Ro-ràdh
This manual provides detailed instructions for the assembly, operation, and maintenance of your new pamo Industrial Design Garment Rack, model LAS 3 Black. Please read this manual thoroughly before assembly and use to ensure proper function and longevity of the product. Keep this manual for future reference.
Fiosrachadh Sàbhailteachd
- Ensure all connections are tightened securely during assembly to prevent instability.
- Do not exceed the maximum load capacity of 300 pounds (approximately 100 kilograms) to avoid structural damage or collapse.
- Place the garment rack on a level, stable surface. Uneven surfaces can compromise stability.
- During assembly, keep all small parts, such as screws and fittings, out of reach of children and pets.
- While the rack is designed to be freestanding, optional wall attachment using the included screws and dowels is recommended for enhanced stability, especially in households with children or in areas prone to movement.
- Avoid hanging excessively heavy items on one side, as this can create an imbalance. Distribute weight evenly.
Susbaint pacaid
Mus tòisich thu air a’ chruinneachadh, dèan cinnteach gu bheil na pàirtean uile an làthair agus gun mhilleadh. Ma tha pàirtean sam bith a dhìth no millte, cuir fios gu seirbheis luchd-cleachdaidh.
- Steel pipes (various lengths for vertical and horizontal sections)
- Cast iron fittings (elbows, T-connectors, flanges for connections)
- Non-slip felt pads for floor protection
- Screws and dowels (for optional wall mounting)
- Assembly tool (e.g., Hex key)
- Leabhar-làimhe stiùiridh
Stiùireadh Co-chruinneachadh
The pamo Industrial Design Garment Rack features a simple screw system for straightforward assembly. No drilling into the floor is required due to the non-slip felt pads.
- Dì-phacaich na co-phàirtean: Thoir a-mach na pàirtean gu faiceallach agus cuir iad air uachdar glan, bog gus casg a chur air sgrìoban.
- Comharraich pàirtean: Familiarize yourself with the different pipe lengths and fitting types.
- Cruinnich na h-earrannan bunaiteach: Begin by connecting the horizontal base pipes to the vertical support pipes using the appropriate cast iron fittings. Ensure all connections are hand-tightened initially.
- Ceangail Dìon Làir: Apply the non-slip felt pads to the bottom of the base flanges to protect your flooring.
- Tog Structar Ingearach: Continue by adding the remaining vertical pipes and horizontal hanging rails, connecting them with the cast iron fittings. The system is designed to be modular and adjustable.
- Teannaich a h-uile ceangal: Once the entire structure is assembled, use the provided assembly tool (hex key) to securely tighten all screw connections. Do not overtighten.
- Stàladh Balla Roghainneil: For additional stability, especially if the rack will hold a significant amount of weight or is in a high-traffic area, use the included screws and dowels to secure the top flanges to a wall. Ensure you are drilling into a suitable wall material and using appropriate tools.
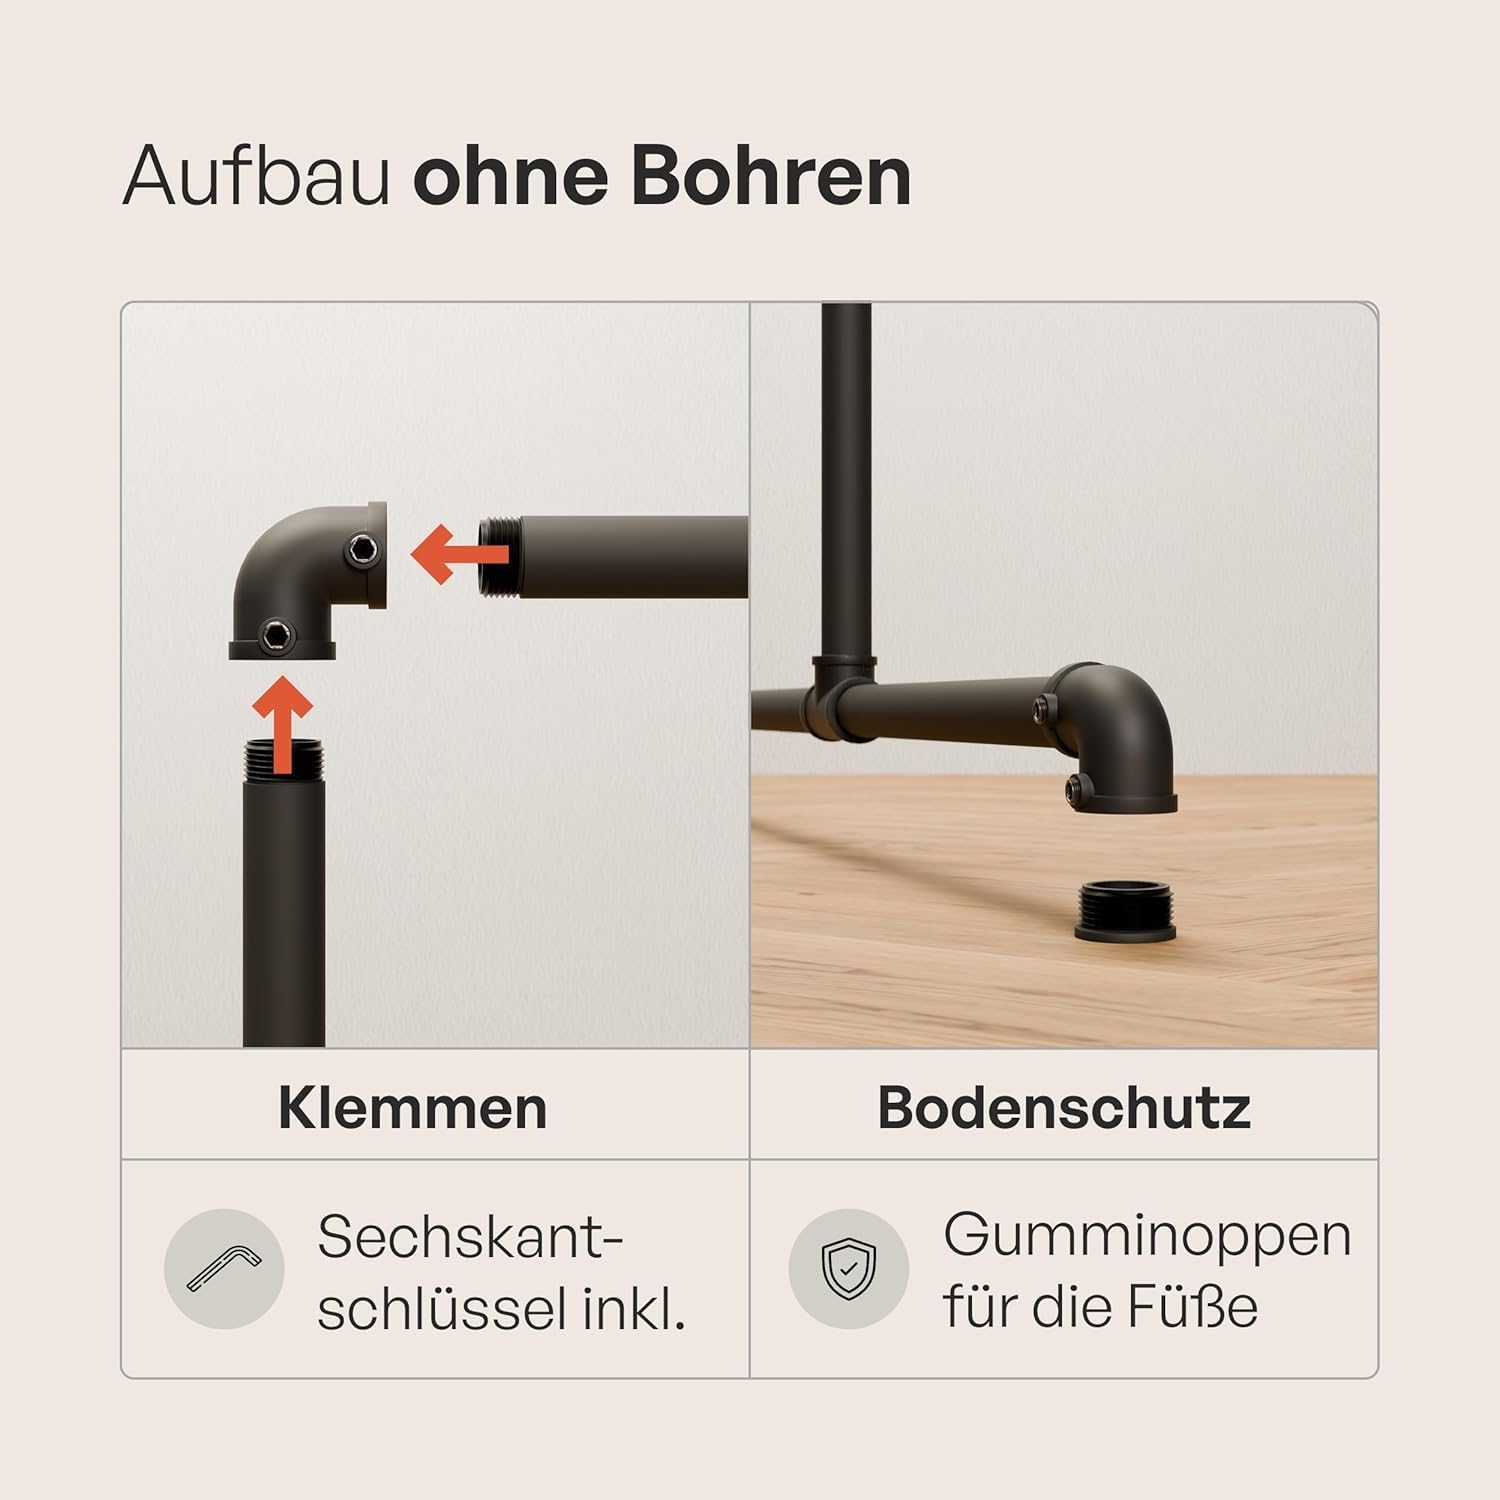
Image: Simple screw system for easy assembly.
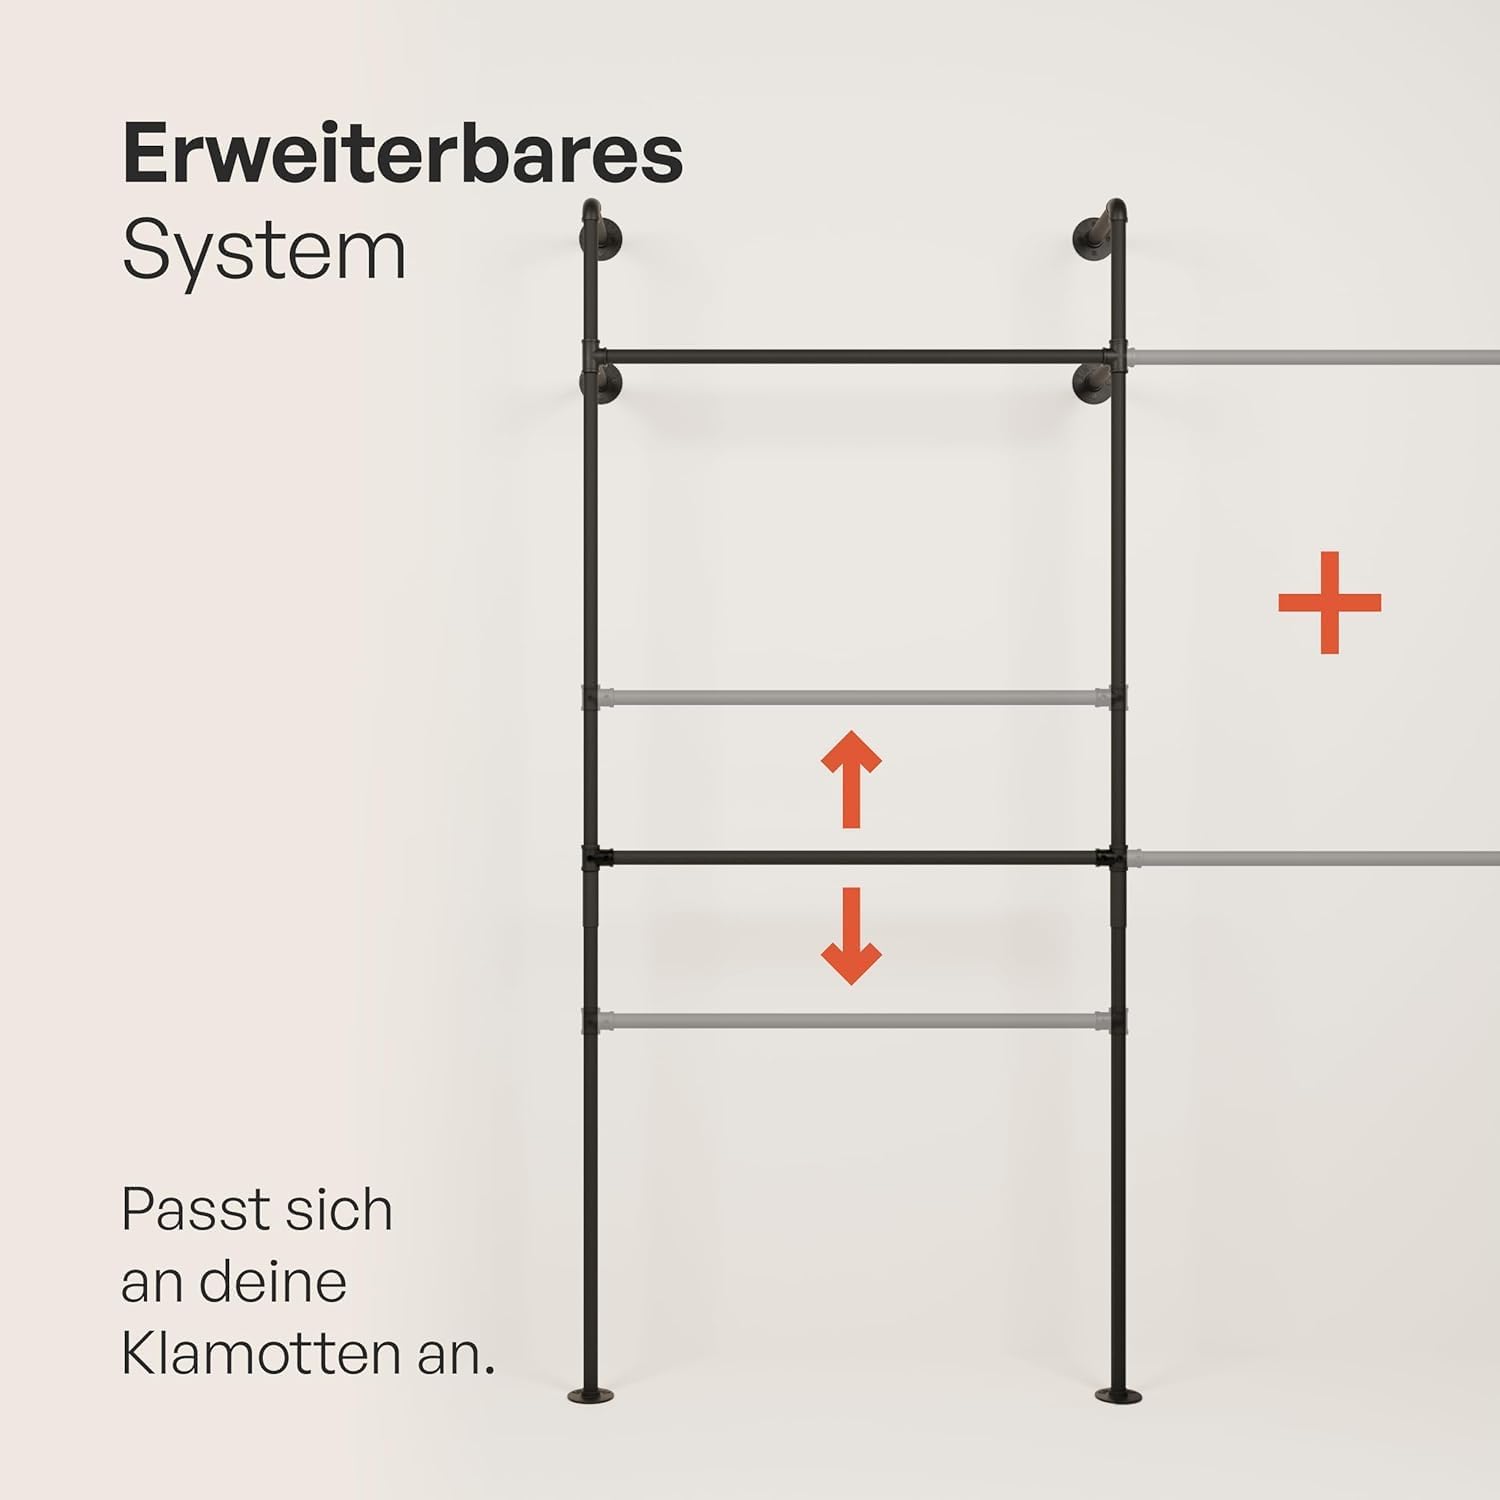
Image: Illustration of pipe clamping mechanism and floor protection pads.

Image: The modular design allows for an expandable system that adapts to your storage needs.
Stiùireadh Obrachaidh
The pamo Industrial Design Garment Rack is designed for versatile clothing storage in various settings.
- A' luchdachadh Aodach: Hang garments evenly across the two horizontal rails. Avoid concentrating heavy items in one small section to maintain balance and prevent stress on the structure.
- Sgaoileadh cuideam: Distribute the weight of your clothing as evenly as possible across the entire rack. The maximum load capacity is 300 pounds (100 kg).
- Suidheachadh: The freestanding design allows for flexible placement in walk-in wardrobes, bedrooms, or other areas. Ensure adequate space around the rack for easy access to garments.
- Integration with Other Furniture: The thoughtful dimensions allow for integration with standard dressers or storage units underneath the hanging rails, creating a comprehensive open wardrobe system.

Image: The LAS 3 Black garment rack in use, showcasing its capacity for clothing storage.
Cumail suas
To ensure the longevity and appearance of your garment rack, follow these simple maintenance guidelines:
- Glanadh: Sguab na h-uachdaran meatailt le clò bog,amp cloth. For stubborn marks, a mild soap solution can be used, followed by drying with a clean cloth. Avoid abrasive cleaners or harsh chemicals, as these can damage the matte black powder coating.
- Sgrùdadh: Periodically check all screw connections and fittings to ensure they remain tight. Retighten if necessary.
- Coating Durability: The rack features a MatteGuard powder coating, which is designed to be highly scratch-resistant and durable. Despite this, avoid sharp objects that could scratch the finish.

Image: Close-up illustrating the quality of the matte black powder-coated pipes, highlighting 100% scratch resistance, MatteGuard coating, and extreme durability.
Fuasgladh thrioblaidean
| Trioblaid | Adhbhar a dh’fhaodadh a bhith ann | Fuasgladh |
|---|---|---|
| Rack feels wobbly or unstable. | Loose connections; uneven floor; excessive weight on one side; no wall attachment. | Check and tighten all screw connections. Move the rack to a level surface. Redistribute clothing weight evenly. Consider using the optional wall attachment for added stability. |
| Pipes do not fit together. | Incorrect pipe or fitting used; debris in threads. | Refer to the assembly instructions to ensure the correct parts are being connected. Check threads for any obstructions and clear them. |
| Floor is scratched. | Non-slip felt pads are missing or dislodged. | Ensure all non-slip felt pads are securely attached to the bottom of the base flanges. Replace any missing pads. |
Sònrachaidhean
- Brand: pamo
- Modail: LAS 3 (P-01-089)
- Dath: Dubh
- Stuth: Metal (Solid steel tubes, malleable cast iron fittings)
- Crìochnaich: Matte Black Powder Coated (MatteGuard)
- Seòrsa stàlaidh: Free Standing (Optional wall attachment)
- Cleachdadh air a mholadh: Garment storage, wardrobe organization
- Meudan Bathar (Tuairmseach):
- Width: 290 cm (approx. 114 inches)
- Depth: 60 cm (approx. 23.6 inches)
- Height: 194 cm (approx. 76.4 inches)
- Comas luchdaidh: 300 punnd (100 cileagram)
- Cuideam nì: 40.5 not
- Co-chruinneachadh a dhìth: Tha

Image: Detailed dimensions of the LAS 3 Black garment rack.

Image: Structural overview of the pamo LAS 3 Black garment rack without clothing.
Barantas agus Taic
For warranty information and customer support, please refer to the documentation provided at the time of purchase or contact pamo directly through their official website or retailer. As a German company, pamo offers customer service to assist with any product-related inquiries.
Ask a question about this manual
Ask about setup, troubleshooting, compatibility, parts, safety, or missing instructions. Manuals+ will review the question and use this page’s manual context to help answer it.