1. Ro-ràdh
Thank you for choosing the Speaka Professional SP-TMS-200 Monitor Stand. This manual provides essential information for the safe and efficient installation, operation, and maintenance of your monitor stand. Please read these instructions carefully before assembly and retain them for future reference.
Fiosrachadh Sàbhailteachd
- Dèan cinnteach gu bheil na pàirtean uile an làthair agus gun mhilleadh mus tèid an cur ri chèile.
- Do not exceed the maximum weight capacity or screen size specified for this stand.
- Always use appropriate tools and follow assembly steps precisely.
- Cùm clann is peataichean air falbh aig àm co-chruinneachadh.
- If you encounter any difficulties, consult a qualified professional.
2. Feartan toraidh
The Speaka Professional SP-TMS-200 Monitor Stand offers enhanced ergonomics and organization for your workspace. Key features include:
- 10 Height Adjustments: Achieve optimal viewing height for improved comfort.
- 360° Rotatable VESA Plate: Allows for flexible screen orientation (landscape or portrait).
- Atharrachadh gun innealan: Easily modify settings without additional tools.
- Anti-Slip Silicone Pads: Provides enhanced stability and protects your desk surface.
- Gearr-chàball: Organizes cables for a tidy and professional appearance.
3. Pasgan-susbaint
Please verify that all parts are included in your package. Refer to the product packaging for a detailed list of components and hardware.

Dealbh 1: Aghaidh view of the Speaka Professional SP-TMS-200 Monitor Stand, showing the base, adjustable pole, and VESA mounting plate.
4. Stiùireadh Stèidheachaidh
Follow these general steps to assemble your monitor stand. Specific hardware and detailed steps may vary; always refer to the included assembly guide for precise instructions.
- Dì-phacaich na co-phàirtean: Thoir a h-uile pàirt a-mach às a’ phacaid gu faiceallach agus cuir iad air uachdar glan, rèidh.
- Ceangail Bun-stèidh: Secure the vertical pole to the base using the provided screws and tools. Ensure it is firmly tightened.
- Mount VESA Plate: Attach the VESA mounting plate to the back of your monitor using the appropriate screws for your display. Ensure the screws are not overtightened.
- Stàlaich Monitor: Carefully slide the monitor (with the attached VESA plate) onto the top of the vertical pole. Secure it in place according to the stand's design, typically with a locking screw or mechanism.
- Riaghladh càbaill: Route your monitor cables through the integrated cable clip on the stand's pole for a neat setup.

Ìomhaigh 2: Ceàrnach view of the monitor stand, highlighting the height adjustment markings on the vertical pole.
5. Stiùireadh Obrachaidh
Once assembled, the monitor stand allows for various adjustments to optimize your viewann an eòlas.
Atharrachadh àirde
The stand features 10 height settings. To adjust the height, loosen the locking mechanism on the vertical pole, slide the monitor to your desired height, and then securely tighten the locking mechanism. Ensure the monitor is stable after adjustment.
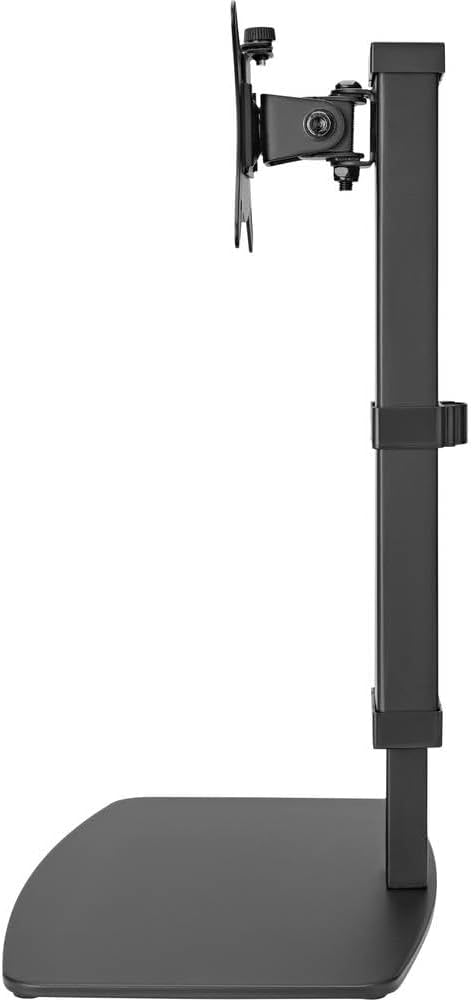
Ìomhaigh 3: Taobh view of the monitor stand, illustrating the range of height adjustment possible with the vertical pole.
Tilt and Swivel Adjustment
The VESA plate allows for tilting and swiveling your monitor. Gently adjust the monitor to your preferred angle. The 360° rotation feature enables easy switching between landscape and portrait orientations.
Stiùireadh Càbaill
Utilize the integrated cable clip on the rear of the stand's pole to route and secure your monitor and power cables. This helps maintain a clean and organized workspace.
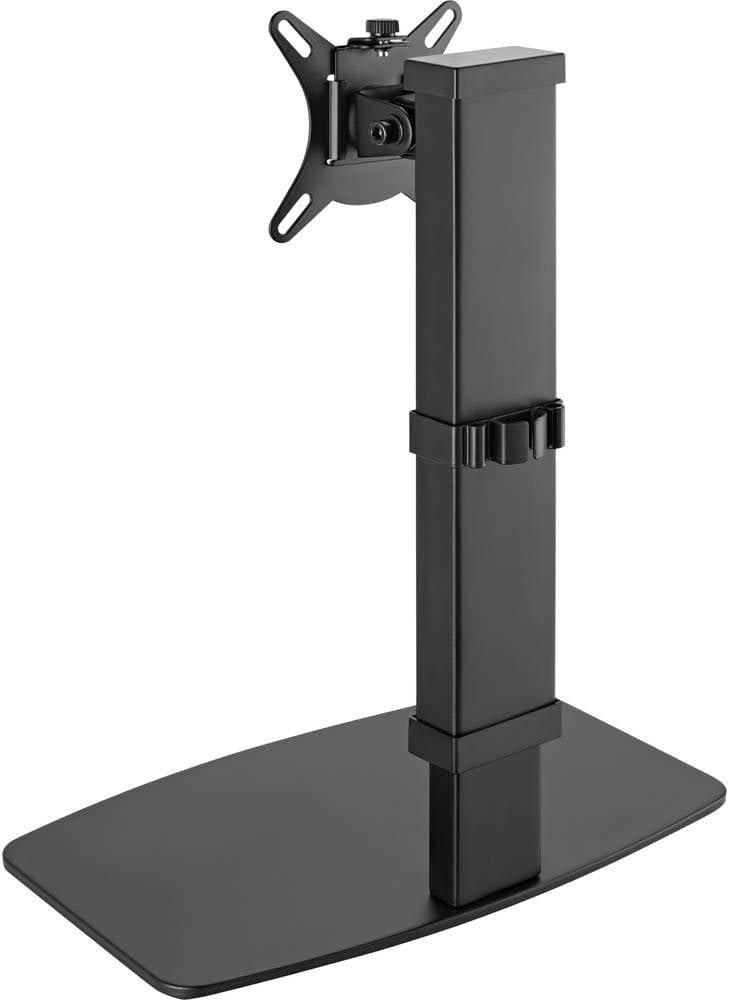
Dealbh 4: Cùl view of the monitor stand, showing the cable management clip on the vertical pole.
6. Cumail suas
Regular maintenance ensures the longevity and optimal performance of your monitor stand.
- Glanadh: Sguab an stand le clò bog, tioram. Airson comharran stòlda, cleachd clò beagan tioram.amp Faodar clò le siabann tlàth a chleachdadh, agus an uair sin tiormachadh. Seachain innealan-glanaidh no fuasglaidhean sgrìobach.
- Sgrùdaidhean: Thoir sùil bho àm gu àm air na sgriothan agus na ceanglaichean uile gus dèanamh cinnteach gu bheil iad fhathast teann. Teannaich a-rithist ma tha sin riatanach.
- Gluasad: Ensure the height adjustment mechanism moves smoothly. Do not force any adjustments.
7. A ’dèanamh trioblaid
If you encounter issues with your monitor stand, consider the following common solutions:
- Tha an seasamh neo-sheasmhach: Ensure all assembly screws are securely tightened. Verify the monitor's weight and size are within the stand's specifications. Check that the anti-slip pads on the base are intact and making full contact with the surface.
- Duilgheadas atharrachadh àirde: Ensure the height locking mechanism is fully disengaged before attempting to adjust. Do not apply excessive force. Check for any obstructions.
- Monitor not level: Check that the VESA plate is securely attached to both the monitor and the stand. Adjust the tilt mechanism if necessary.
Ma mhaireas na duilgheadasan, cuir fios gu taic luchd-cleachdaidh.
8. Sònrachaidhean
| Brand | Speaka Professional |
| Modail Àireamh | SP-10092880 |
| Innealan co-fhreagarrach | Monitors (17" to 32") |
| Atharrachadh àirde | 10 suidheachadh |
| VESA Plate Rotation | 360° |
| Dath | Various (typically black) |
9. Barantas agus Taic
This Speaka Professional product comes with a Barantas 1-bliadhna for spare parts, as per the manufacturer's terms.
For technical support, warranty claims, or further assistance, please refer to the contact information provided with your purchase or visit the official Speaka Professional weblàrach.