Ro-ràdh
Tapadh leibh airson ceannachasing the Nedis CLAR005BK Digital LED Projection Alarm Clock Radio. This manual provides detailed instructions for the safe and efficient use of your new device. Please read this manual thoroughly before use and keep it for future reference.
Stiùireadh sàbhailteachd
- Leugh a h-uile stiùireadh gu faiceallach mus obraich thu an inneal.
- Na cuir a-mach an inneal gu bhith a’ sileadh no a’ frasadh uisge.
- Na cuir nithean làn de liquids, leithid vasaichean, air an inneal.
- Dèan cinnteach gu bheil fionnarachadh ceart ann. Na cuir bacadh air fosglaidhean fionnarachaidh sam bith.
- Cuir an inneal air uachdar seasmhach, còmhnard.
- Cleachd dìreach an inneal-atharrachaidh cumhachd a tha air a thoirt seachad leis an inneal.
- Na feuch ri an inneal a chàradh no atharrachadh thu fhèin. Thoir aire do luchd-obrach teisteanasach airson a h-uile seirbheis.
- Cùm an inneal air falbh bho sholas dìreach na grèine, stòran teas, agus raointean magnetach làidir.
Susbaint pacaid
Thoir sùil air susbaint a’ phacaid gus dèanamh cinnteach gu bheil a h-uile nì ann agus ann an deagh staid:
- Nedis CLAR005BK Projection Alarm Clock Radio
- Power Adapter (if included, otherwise integrated cable)
- Leabhar-làimhe cleachdaiche (an sgrìobhainn seo)
Bathar seachadview
Familiarize yourself with the various parts and controls of your alarm clock radio.

Figear 1: Aghaidh View. This image displays the front of the alarm clock radio, featuring a prominent red LED display showing "8:00". The "Nedis" brand logo is visible above the display, and text "ALARM CLOCK RADIO / TIME PROJECTION" is below. Buttons are visible on the top surface.

Figear 2: Prìomh Smachdan. This image shows the top panel of the alarm clock radio, highlighting the various control buttons for setting time, alarms, radio functions, and snooze.
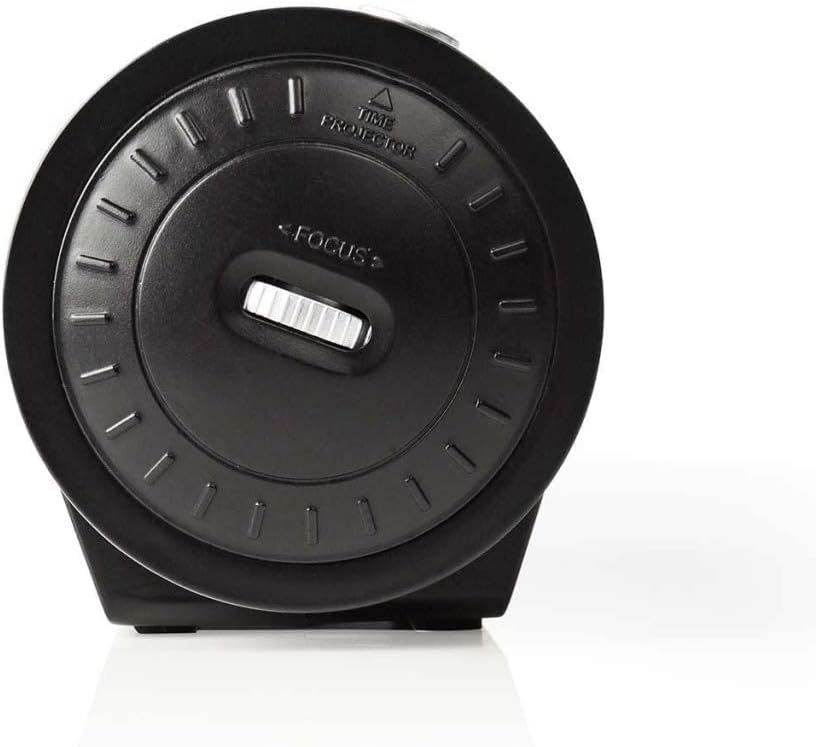
Figure 3: Projector Side. This image focuses on the side of the alarm clock radio where the time projector lens is located. A "FOCUS" wheel is clearly visible for adjusting the clarity of the projected time, along with an indicator for "TIME PROJECTOR".
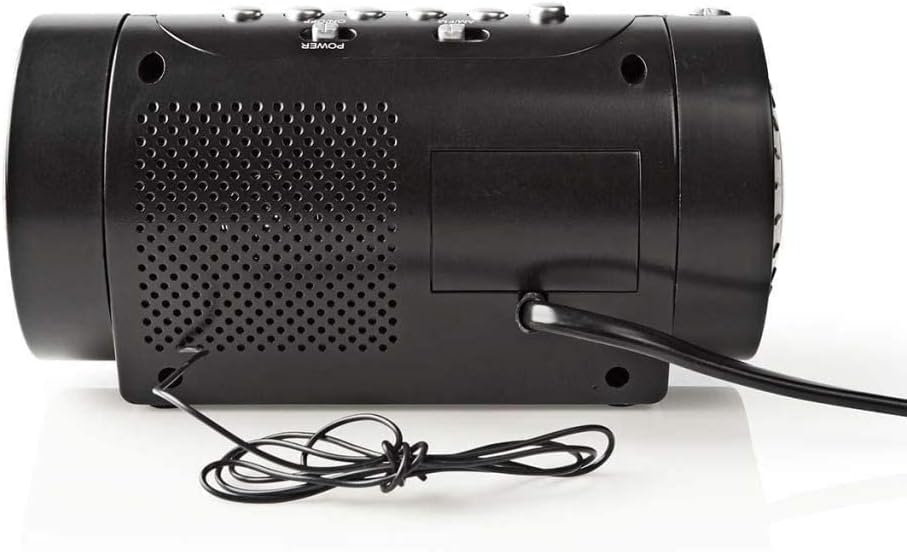
Figear 4: Pannal Cùil. This image shows the back of the alarm clock radio, featuring the integrated power cable, a speaker grille for audio output, and a battery compartment cover (if applicable).
Control Buttons (Refer to Figure 2)
- SET TIME: Press to enter time setting mode.
- HOUR / MIN: Use to adjust hour and minute during time/alarm setting.
- ALARM 1 / ALARM 2: Press to set Alarm 1 or Alarm 2.
- CADAL / SNOOZE / DIMMER: Press to activate snooze, set sleep timer, or adjust display brightness.
- RADIO ON/OFF / BAND: Power on/off the radio or switch between AM/FM bands.
- TUNE +/-: Adjust radio frequency.
- TOIRT +/-: Adjust radio volume.
- PROJECTION ON/OFF: Turn the time projection on or off.
- PROJECTION ROTATION: Rotate the projected time display.
- FOCUS (Figure 3): Adjust the clarity of the projected time.
Suidhich
1. Ceangal Cumhachd
- Uncoil the power cable from the rear of the unit (Figure 4).
- Plug the power cable into a standard wall outlet. The LED display will light up.
- (Optional) For battery backup, open the battery compartment (usually at the bottom or rear) and insert 2x AAA batteries (not included). This will preserve time settings during a power outage.
2. A ’suidheachadh na h-ùine
- Brùth agus cùm an SEANN TIOMNAIDH putan gus an tòisich àireamhan na h-uairean a’ priobadh.
- Cleachd an UAIR putan gus an uair atharrachadh. Thoir aire do chomharran AM/PM ma tha iad ann.
- Brùth an SEANN TIOMNAIDH putan a-rithist, agus bidh na figearan mionaidean a’ priobadh.
- Cleachd an MIN putan gus na mionaidean atharrachadh.
- Brùth SEANN TIOMNAIDH a-rithist gus dearbhadh agus modh suidheachadh ùine fhàgail.
3. Adjusting the Projection
- Locate the projector lens on the side of the unit (Figure 3).
- Brùth an PRÒISEACT AIR / OFF putan gus an ro-mheasadh ùine a ghnìomhachadh.
- Rothaich an ROTATION PROJECTION button/dial to adjust the angle of the projected time on your wall or ceiling.
- Tionndaidh an FOCUS wheel (Figure 3) until the projected time is clear and sharp.
Ag obrachadh
1. Obrachadh Rèidio
- Brùth an RADIO AIR / OFF putan gus an rèidio a chuir air.
- Brùth an BANN button (often the same as RADIO ON/OFF) to switch between AM and FM bands.
- Cleachd an TUNE +/- putanan gus gleusadh le làimh chun stèisean a tha thu ag iarraidh.
- Atharraich an tomhas-lìonaidh a ’cleachdadh an TOIRT +/- putanan.
- To save a preset station: Tune to the desired station, then press and hold a preset button (if available, usually numbered 1-10 or M1-M5) until you hear a confirmation beep.
- To recall a preset station: Briefly press the corresponding preset button.
- Gus an rèidio a chuir dheth, brùth air an iuchair RADIO AIR / OFF putan a-rithist.
2. Roghainnean rabhaidh
This device features two independent alarms (Alarm 1 and Alarm 2).
- A’ suidheachadh Ùine an Alarma:
- Brùth agus cùm an Alarm 1 or Alarm 2 am putan gus am bi na figearan uair an rabhaidh a’ priobadh.
- Cleachd an UAIR putan gus an uair rabhaidh a tha thu ag iarraidh a shuidheachadh.
- Brùth an Alarm 1 or Alarm 2 putan a-rithist, agus bidh na figearan mionaidean a’ priobadh.
- Cleachd an MIN putan gus na mionaidean rabhaidh a tha thu ag iarraidh a shuidheachadh.
- Brùth an Alarm 1 or Alarm 2 button once more to confirm the alarm time.
- Selecting Alarm Source (Buzzer/Radio):
- Às dèidh dhut an t-àm rabhaidh a shuidheachadh, brùth air a’ phutan Alarm 1 or Alarm 2 button repeatedly to cycle through alarm modes: Buzzer, Radio, or Off. An indicator icon will show the selected mode.
- Dreuchd Snooze: Nuair a chluinneas an inneal-rabhaidh, brùth air an SNOZE putan gus an inneal-rabhaidh a chur dheth airson timcheall air 9 mionaidean. Seinnidh an inneal-rabhaidh a-rithist às dèidh na h-ùine seo.
- Cuir stad air an Alarm: To turn off the alarm for the day, press any button other than SNOOZE. The alarm will reset for the next day.
- Disabling Alarm Permanently: Cycle through the alarm source options until "OFF" or no alarm icon is displayed.
3. Timer cadail
Leigidh an timer cadail leis an rèidio cluich airson ùine shuidhichte mus cuir e dheth gu fèin-ghluasadach.
- Fhad ’s a tha an rèidio a’ cluich, brùth air a’ phutan LAOIDH button (often combined with SNOOZE/DIMMER) repeatedly to cycle through sleep timer options (e.g., 90, 60, 30, 15 minutes, OFF).
- Cuiridh an rèidio dheth gu fèin-ghluasadach às dèidh na h-ùine taghte.
4. Dimmer Taisbeanaidh
Adjust the brightness of the LED display.
- Brùth an DIMMHOR button (often combined with SNOOZE/SLEEP) repeatedly to cycle through different brightness levels (e.g., High, Medium, Low, Off).
Cumail suas
Glanadh
- Thoir air falbh an inneal bhon ionad cumhachd an-còmhnaidh mus glanadh thu.
- Cleachd clò bog, tioram gus na h-uachdaran a-muigh a sguabadh.
- Na cleachd innealan-glanaidh sgrìobach, cèir no fuasglaidhean oir dh’ fhaodadh iad milleadh a dhèanamh air a’ chrìochnachadh.
- For the projector lens, use a soft, lint-free cloth specifically designed for optics.
Battery Replacement (for backup)
- If the time display is incorrect after a power outage, is dòcha gum feumar na bataraidhean cùl-taice a chur nan àite.
- Open the battery compartment cover (refer to Figure 4 for general location).
- Remove the old batteries and dispose of them properly according to local regulations.
- Insert new 2x AAA batteries, ensuring correct polarity (+/-).
- Dùin an còmhdach roinn bataraidh.
Fuasgladh thrioblaidean
| Trioblaid | Adhbhar a dh’fhaodadh a bhith ann | Fuasgladh |
|---|---|---|
| Gun chumhachd/Dhùin an taisbeanadh | Power cable not connected; Power outage. | Ensure power cable is securely plugged into a working outlet. Check household circuit breaker. |
| Projected time is blurry | Cha deach am fòcas atharrachadh. | Atharraich an FOCUS wheel on the projector side until the image is clear. |
| Projected time is upside down or sideways | Projection rotation needs adjustment. | Cleachd an ROTATION PROJECTION button/dial to orient the time correctly. |
| Chan eil an inneal-rabhaidh a’ fuaim | Alarm not set; Alarm volume too low; Alarm mode set to OFF. | Verify alarm time and ensure alarm is activated (Buzzer or Radio mode). Increase radio volume if alarm source is radio. |
| Fàilteachas rèidio truagh | Antenna gun a bhith air a leudachadh/air a shuidheachadh gu ceart; bacadh. | Extend the wire antenna fully and reposition it for better reception. Move the unit away from other electronic devices. |
Sònrachaidhean
- Brand: NEDIS
- Modail: CLAR005BK
- Dath: Dubh
- Seòrsa taisbeanaidh: LED didseatach
- Feartan sònraichte: Alarm, Snooze, Time Projection
- Stòr cumhachd: Electric (AC), Battery Backup (2x AAA, not included)
- Ceangal: Jack 3,5 mm (likely for antenna or headphone output)
- Cuideam: 364.9 gram
- Stuth: Plastaig
- Cleachdadh: A-staigh
- Àireamh Pàirt Dèanadair: CLAR005BK
- GTIN: 05412810274116
Barantas
This product is covered by a manufacturer's warranty. Please refer to the warranty card included in your package or contact your retailer for specific terms and conditions. Keep your proof of purchase for warranty claims.
Taic
For technical support, troubleshooting assistance, or to inquire about spare parts, please contact Nedis customer service. Contact details can typically be found on the Nedis weblàrach no air pacaigeadh an toraidh.
Faodaidh tu cuideachd tadhal air an Bùth Nedis air Amazon airson tuilleadh fiosrachaidh toraidh.