1. Ro-ràdh
Thank you for choosing the Einhell TC-MS 2513 L Miter Saw. This precision tool is designed for cutting wood and coated panels with accuracy and efficiency. This manual provides essential information for the safe and effective operation, assembly, maintenance, and troubleshooting of your miter saw. Please read these instructions carefully before using the product for the first time and keep them for future reference.
1.1 Stiùireadh Sàbhailteachd Coitcheann
- Cuir ort uidheamachd dìon pearsanta (PPE) iomchaidh an-còmhnaidh, a’ gabhail a-steach speuclairean sàbhailteachd, dìon èisteachd, agus masg duslach.
- Dèan cinnteach gu bheil am pìos obrach gu tèarainte clampair a ghearradh mus tèid a ghearradh.
- Keep hands clear of the cutting area and rotating blade.
- Disconnect the power supply before making any adjustments, changing blades, or performing maintenance.
- Operate the saw in a well-lit and well-ventilated area.
- Na obraich an sàbh ann an damp no suidheachaidhean fliuch.
- Cùm clann agus luchd-amhairc air falbh bhon raon obrachaidh.
- Use only sharp, undamaged saw blades suitable for the material being cut.
2. Toradh thallview
The Einhell TC-MS 2513 L Miter Saw features a high-quality turntable for precise angle adjustments, a durable carbide-tipped saw blade for excellent cutting results, and a laser guide for accurate cuts. It also includes a dust collector for a cleaner workspace and auxiliary clamps for securing long workpieces.
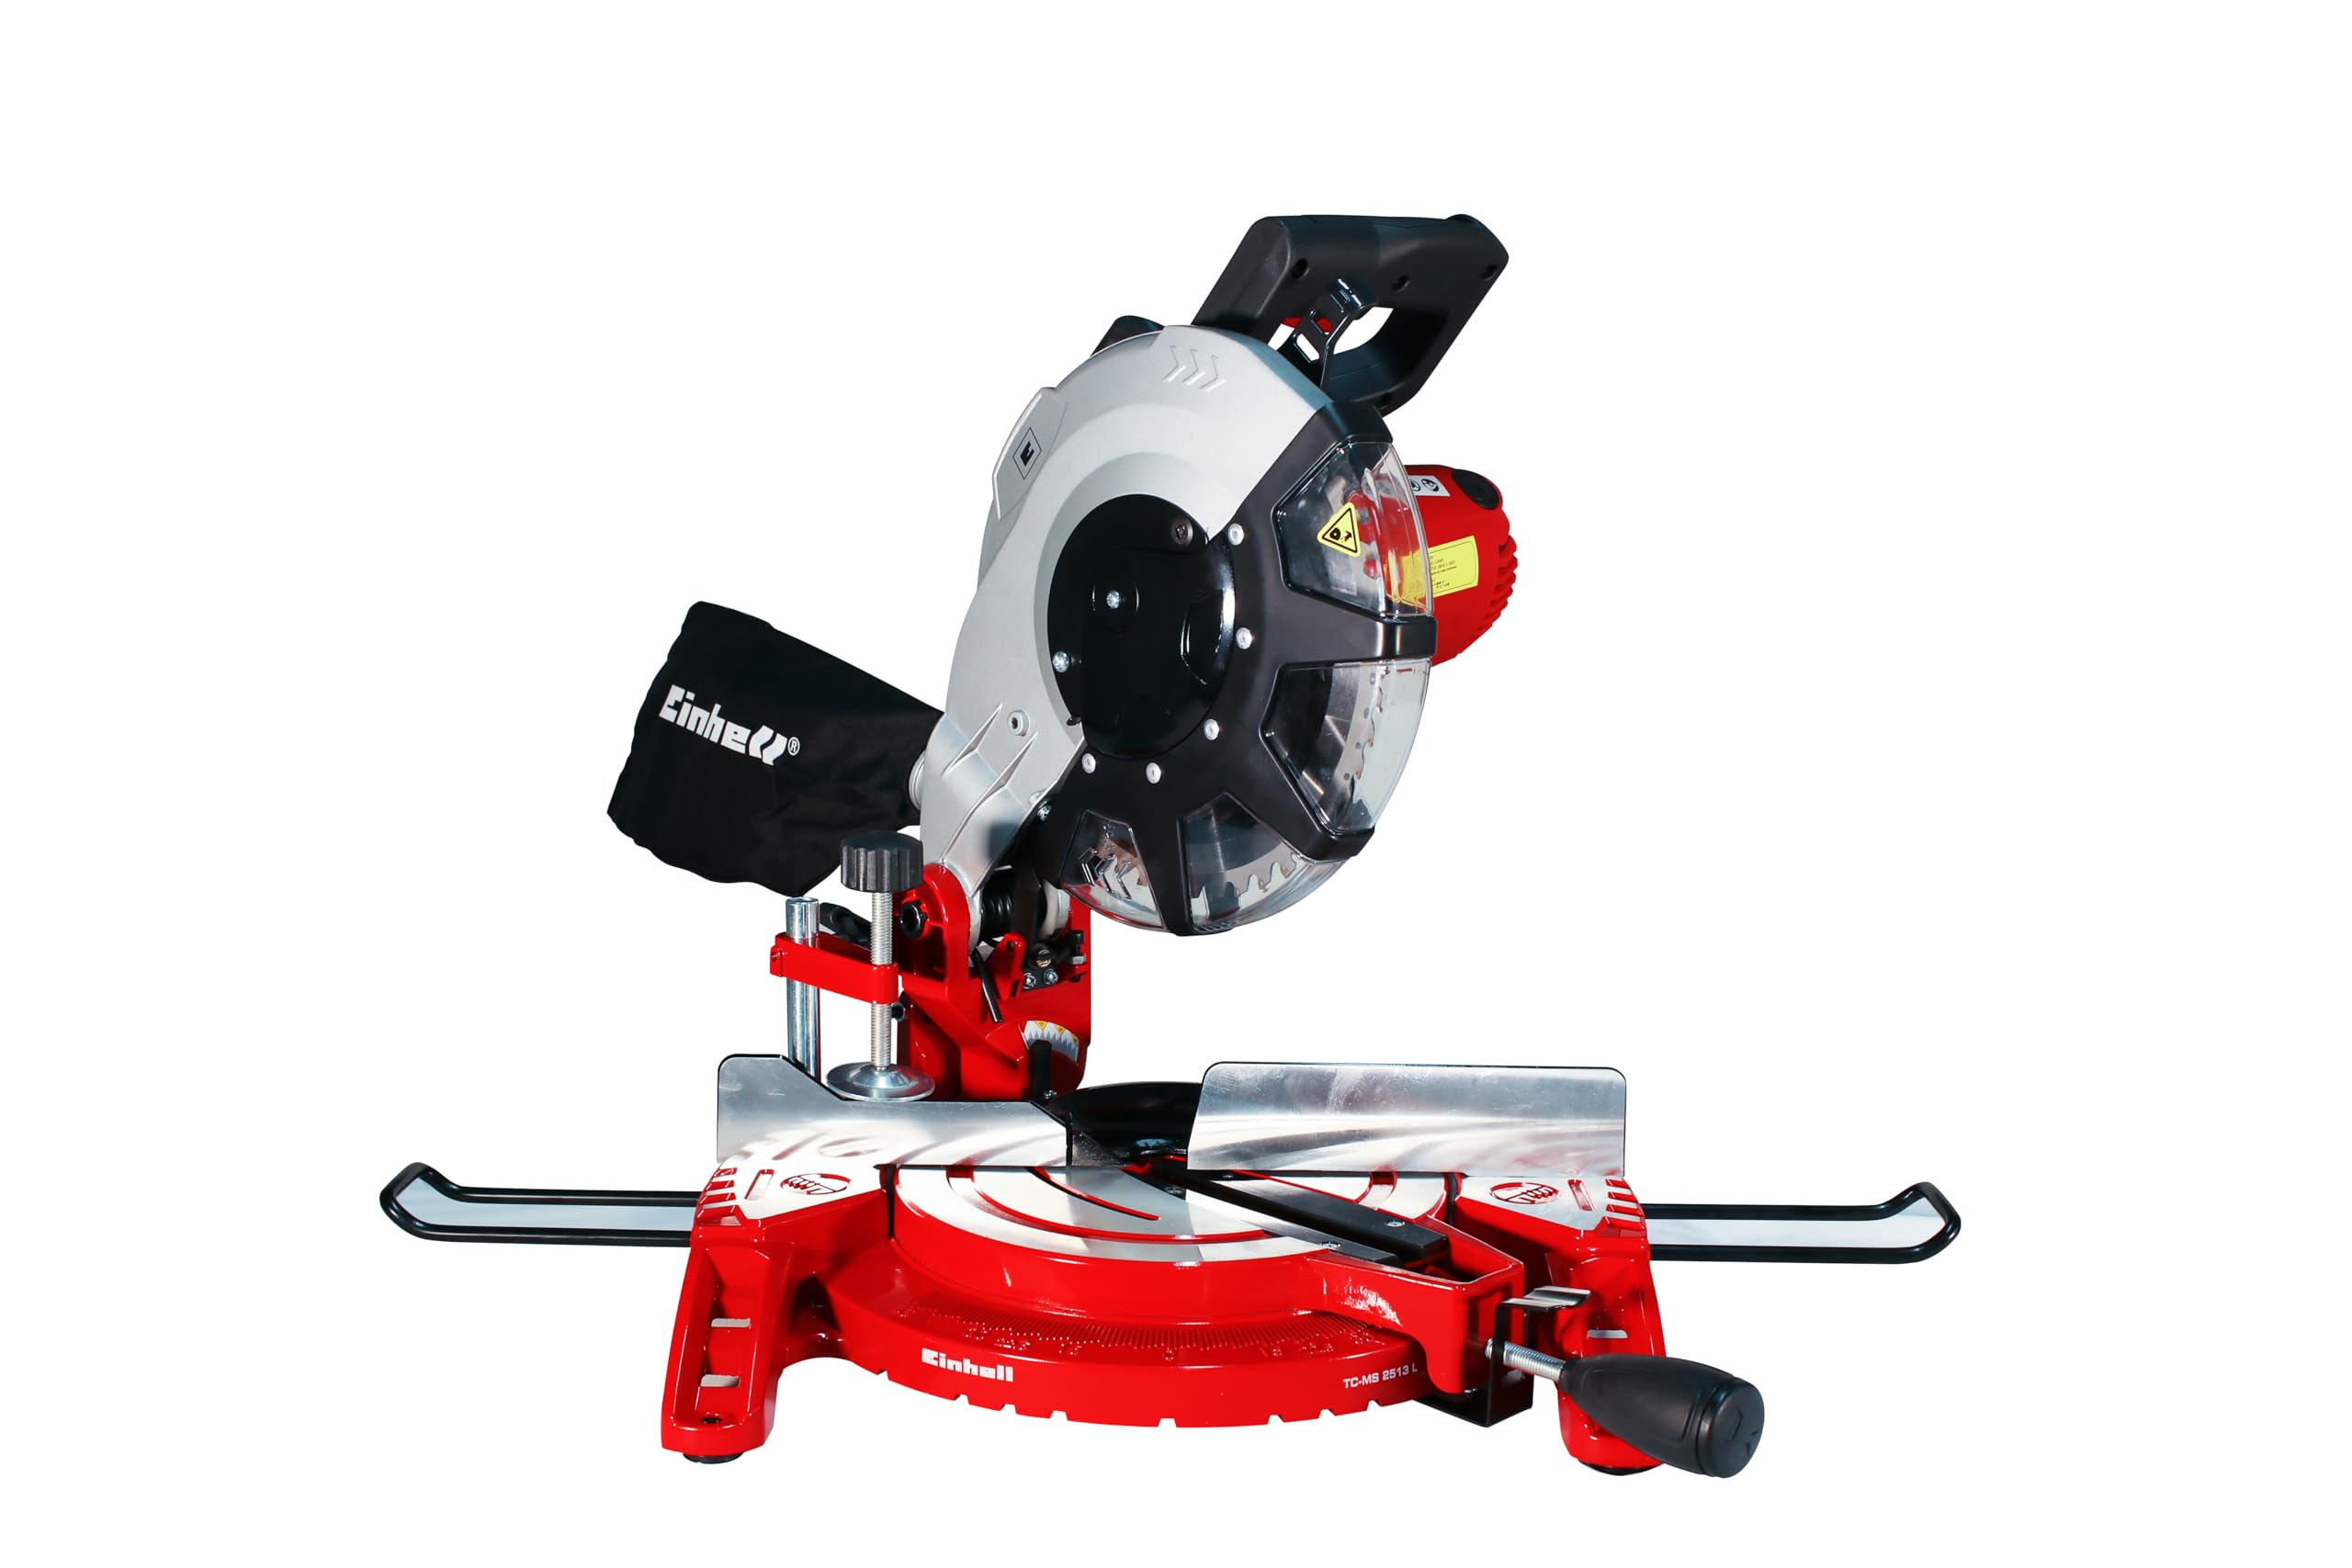
Figear 1: Aghaidh view of the Einhell TC-MS 2513 L Miter Saw, showing the main components including the saw head, blade guard, turntable, and base.
2.1 Co-phàirtean
- Saw Head with Motor and Blade Guard
- Handle with Power Switch
- Stiùireadh laser
- Turntable with Angle Scale
- Plàta bonn
- Pìos obrach Clamps (Auxiliary Grips)
- Bag Cruinneachadh Dust
- Blade Locking Button
- Luamh rèiteachaidh Bevel
- Workpiece a 'toirt taic

Figure 2: Included accessories: workpiece supports, clamp, and dust collection bag.
3. Suidhich
3.1 A’ dì-phapadh agus a’ cruinneachadh
- Thoir air falbh na pàirtean gu lèir bhon phacaid gu faiceallach.
- Ensure all parts listed in the manual are present and undamaged.
- Attach the workpiece supports to the base plate if not already installed.
- Mount the dust collection bag to the designated port.
3.2 Blade Installation (if not pre-installed)
- RABHADH: Disconnect the saw from the power supply before installing or changing the blade.
- Press and hold the blade locking button to prevent the blade from rotating.
- Cleachd an iuchair a tha air a thoirt seachad gus an sgriubha gleidhidh lann a leigeil ma sgaoil.
- Thoir air falbh gu faiceallach an flange a-muigh agus an seann lann.
- Place the new carbide-tipped saw blade onto the spindle, ensuring the rotation direction arrow on the blade matches the arrow on the blade guard.
- Reattach the outer flange and tighten the retaining screw securely.
- Release the blade locking button.
3.3 Atharrachaidhean Tùsail
- Turntable Angle: Loosen the locking knob for the turntable. Rotate the turntable to the desired angle using the scale. Tighten the locking knob to secure the position. Pre-defined angles can be quickly selected.
- Ceàrn Bevel: Loosen the bevel adjustment lever. Tilt the saw head to the desired bevel angle. Secure the lever.
- Stiùireadh laser: The integrated laser guide assists in precise cutting. Ensure it is clean and functional before use.
4. Stiùireadh Obrachaidh
4.1 Gnìomh Bunaiteach
- Cuir am pìos-obrach gu daingeann an aghaidh a’ fheansa agus daingnich e leis a’ chlò pìos-obrachamp. For long workpieces, use the auxiliary supports.
- Adjust the miter and/or bevel angle as required for your cut.
- Lower the saw head slightly to align the laser line with your cut mark.
- Ensure the blade is not touching the workpiece before starting the motor.
- Press the power switch on the handle to start the motor. Allow the blade to reach full speed.
- Leig ceann an t-sàbhaidh sìos gu slaodach agus gu cunbhalach tron phìos obrach. Na cuir feachd air a’ ghearradh.
- Cho luath ‘s a bhios an gearradh deiseil, leig às an suidse cumhachd agus leig leis an lann stad gu tur mus tog thu ceann an t-sàbhaidh.
- Remove the cut workpiece.
4.2 A’ cleachdadh an treòraiche laser
The laser guide projects a line onto the workpiece, indicating the exact cutting path. Activate the laser by pressing its dedicated switch (if available, or it may activate with the main power). Align this line with your pencil mark for highly accurate cuts.
4.3 Cruinneachadh dust
The included dust collection bag helps to keep your workspace clean by collecting sawdust during operation. Regularly empty the dust bag to maintain optimal collection efficiency. For enhanced dust extraction, the saw can be connected to an external dust extractor system (adapter may be required).
5. Cumail suas
5.1 Glanadh
- Thoir air falbh am pluga cumhachd an-còmhnaidh mus glan thu e.
- Clean the saw regularly to remove sawdust and debris. Use a brush or compressed air.
- Na cleachd riochdairean glanaidh ionnsaigheach no solventan.
- Falmhaich am baga cruinneachaidh duslach gu tric.
- Keep the ventilation slots on the motor housing clear to prevent overheating.
5.2 Ath-nuadhachadh lann
Refer to section 3.2 "Blade Installation" for detailed instructions on how to safely replace the saw blade. Always use sharp, undamaged blades of the correct size and type for your saw.
5.3 Lubrication
Periodically apply a small amount of machine oil to moving parts, such as the pivot points of the saw head and turntable, to ensure smooth operation. Avoid lubricating the blade or motor components.
6. A ’dèanamh trioblaid
| Trioblaid | Adhbhar a dh’fhaodadh a bhith ann | Fuasgladh |
|---|---|---|
| Chan eil sàbh a’ tòiseachadh | Gun sholar cumhachd; suidse lochtach; cus motair. | Check power connection; ensure switch is fully engaged; allow motor to cool down. |
| Gearraidhean mì-chruinn | Blade dull or damaged; incorrect angle setting; workpiece not secured. | Replace blade; re-adjust angles; secure workpiece firmly. |
| Crathadh cus | Loose blade; damaged blade; loose mounting bolts. | Check blade tightness; replace damaged blade; tighten all mounting bolts. |
| Cruinneachadh duslach bochd | Dust bag full; dust port clogged; improper connection. | Empty dust bag; clear dust port; ensure secure connection. |
Ma thachras tu ri duilgheadasan nach eil air an liostadh an seo no mura rèitich na fuasglaidhean a thathar a’ moladh an duilgheadas, cuir fios gu taic luchd-cleachdaidh Einhell.
7. Sònrachaidhean
| Feart | Luach |
|---|---|
| Modail | TC-MS 2513 L |
| Voltage | 220 Volt |
| Cuir a-steach cumhachd | 1600 watt |
| Astar gun luchdachadh | 4000 rpm |
| Stuth lann | Carbide-tipped |
| Meudan toraidh (L x W x H) | 54 x 39 x 40 cm |
| Cuideam | 10 cileagram |
| Feartan sònraichte | Laser guide for cutting, Dust collector, Auxiliary grips |
| GTIN | 4006825609271 |
8. Barantas agus Taic
Einhell products are manufactured to high-quality standards and undergo strict quality controls. This product is covered by a manufacturer's warranty. Please refer to the warranty card included with your purchase or visit the official Einhell weblàrach-lìn airson teirmichean is cumhaichean barantais mionaideach a tha sònraichte don roinn agad.
For technical support, spare parts, or service inquiries, please contact your local Einhell service center or the retailer where you purchased the product.
Einhell A ’Ghearmailt AG
www.einhell.com