InFocus IN112XV
Leabhar-làimhe Cleachdaiche airson Proiseactair Taisbeanaidh InFocus IN112XV
Model: IN112XV | Brand: InFocus
1. Ro-ràdh
This manual provides essential information for the safe and efficient operation of your InFocus IN112XV Presentation Projector. The IN112XV is designed for business presentations and educational use, offering a long lamp life, high brightness, and clear image quality.
- Leudaich Lamp Beatha: Enjoy over 15,000 hours of viewing.
- Àrd soilleireachd: 3800 lumens for clear images in various lighting conditions.
- Co-mheas coimeas: 26000:1 for distinct whites and blacks.
- Sùbailte Viewing: Projects images from 28 inches to 300 inches diagonally.
- Ceangal: Features HDMI input and SVGA (800 x 600) resolution.
2. Pasgan-susbaint
Dèan cinnteach gu bheil na nithean gu lèir a tha air an liostadh gu h-ìosal air an toirt a-steach don phacaid agad:
- InFocus IN112XV Projector
- Corda cumhachd
- Smachd Iomallach
- Càball VGA
- Sgrìobhainnean (an leabhar-làimhe seo agus stiùiridhean eile)
3. Toradh thallview
Familiarize yourself with the components and controls of your InFocus IN112XV projector.
Aghaidh 3.1 View
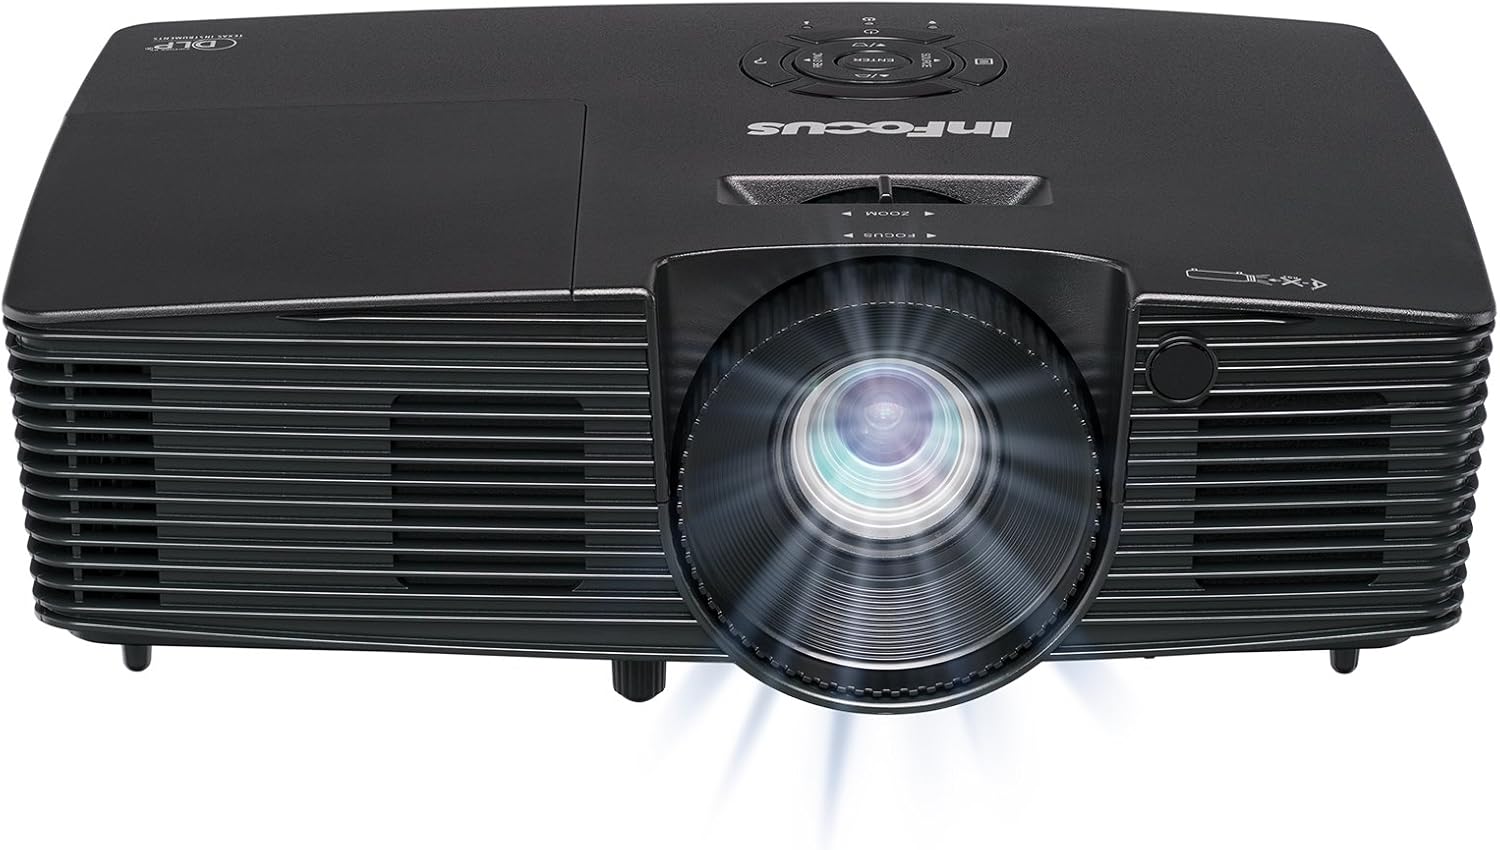
Dealbh 3.1: Aghaidh view of the InFocus IN112XV projector. This image highlights the main projection lens and the front ventilation grilles.
3.2 as àirde View agus Pannal Smachd

Dealbh 3.2: Barr view of the InFocus IN112XV projector. The control panel is visible on the right, featuring buttons for power, source selection, menu navigation, keystone adjustment, and volume. The focus and zoom adjustment rings are located around the lens.
The control panel on the top of the projector allows for basic operation without the remote. Key buttons include:
- Cumhachd: Tionndaidh am proiseactair air no dheth.
- Stòr: A’ dol tro na stòran cuir-a-steach a tha rim faighinn.
- Clàr-bìdh: A’ faighinn cothrom air a’ chlàr-taice taisbeanaidh air an sgrion (OSD).
- Cuir a-steach: A’ dearbhadh roghainnean sa chlàr-taice OSD.
- Iuchraichean saighead: Seòl roghainnean a’ chlàir-taice agus atharraich na roghainnean.
- Re-Sync: Synchronizes the image.
3.3 Cùl View and Connection Ports

Dealbh 3.3: Cùl view of the InFocus IN112XV projector. This image displays the available connection ports, including Video In, S-Video In, Computer In (VGA), HDMI, and the power input.
The rear panel provides various ports for connecting external devices:
- Bhidio ann an: For composite video sources.
- S-Video In: For S-Video sources.
- Computer In (VGA): For connecting to computers via VGA cable.
- HDMI: For digital video and audio sources.
- Seirbheis: For service and maintenance purposes.
- Cur a-steach cumhachd: Connects the power cord to an electrical outlet.
3.4 Smachd Iomallach

Dealbh 3.4: Remote control for the InFocus IN112XV projector. The remote provides full control over the projector's functions, including power, source selection, menu navigation, keystone correction, and volume.
The remote control offers convenient access to all projector functions. Ensure batteries are correctly installed.
4. Suidhich
4.1 Suidheachadh
Position the projector on a stable, flat surface or mount it securely. Ensure there is adequate space around the projector for ventilation.
4.2 Ceangal cumhachd
- Ceangail an càball cumhachd ri port cuir a-steach cumhachd a’ phròiseictar.
- Plug ceann eile an t-sreang cumhachd a-steach do ionad dealain stèidhichte.
4.3 A’ ceangal stòran inntrigidh
The projector supports various input sources. Choose the appropriate cable for your device:
- HDMI: Connect an HDMI cable from your source device (e.g., laptop, media player) to the projector's HDMI port.
- VGA (Cuir a-steach don choimpiutair): Connect a VGA cable from your computer to the projector's Computer In port. This is a plug-and-play connection.
- Video In / S-Video In: Use composite video or S-Video cables for older video sources.
- Innealan-làimhe: To connect an iPad or smartphone, a LightCast Key (sold separately) is required.
5. Stiùireadh Obrachaidh
5.1 A’ cur cumhachd air/dheth
- Gus cumhachd a thoirt air: Brùth an Cumhachd button on the projector's control panel or the remote control. The power indicator light will change.
- Gus cumhachd a thoirt dheth: Brùth an Cumhachd button again. A confirmation message may appear. Press again to confirm shutdown. Allow the projector to cool down before unplugging.
5.2 Selecting an Input Source
After connecting your source device, select the correct input:
- Brùth an Stòr button on the projector's control panel or the remote control to cycle through available inputs (HDMI, VGA, Video, S-Video).
- Alternatively, use the dedicated input buttons (HDMI, VGA, Video) on the remote control.
5.3 A’ cur fòcas agus zoom air dòigh
For a clear and appropriately sized image, adjust the lens rings:

Dealbh 5.1: Manual Focus Adjustment. This image illustrates the effect of adjusting the focus ring, transforming a blurry projection into a clear and sharp image.
- Fòcas: Rothaich an Fòcas ring on the projector lens until the image appears sharp and clear.
- Sùm: Rothaich an Sùm ring on the projector lens to adjust the size of the projected image.
5.4 Ceartachadh Clach-iuchrach
If the projected image appears trapezoidal (wider at the top or bottom), use keystone correction to square it:
- Brùth an Clach-iuchrach+ or Keystone- buttons on the remote control to adjust the image geometry.
5.5 Stiùireadh Clàr
Access the On-Screen Display (OSD) menu for advanced settings:
- Brùth an Clàr-taice button on the remote or control panel.
- Cleachd na saighdean gus seòladh tro roghainnean a’ chlàir-taice.
- Brùth Cuir a-steach gus roghainn a thaghadh no suidheachadh a dhearbhadh.
- Brùth Clàr-taice again to exit the OSD.
6. Cumail suas
6.1 lamp Beatha
Am proiseactair lamp has an estimated life of over 15,000 hours. When the lamp reaches the end of its life, the projector may display a warning message or the image brightness may significantly decrease. Refer to the full service manual for lamp replacement procedures if necessary.
6.2 Glanadh
- Pròiseactair Casing: Use a soft, dry cloth to wipe the exterior of the projector. Do not use abrasive cleaners or solvents.
- Lionsa: Gently clean the lens with a lens cleaning cloth and specialized lens cleaning solution. Avoid touching the lens surface with your fingers.
- Fosglaidhean fionnarachaidh: Thoir sùil is glan na fosglaidhean fionnarachaidh bho àm gu àm gus dèanamh cinnteach à sruth-adhair ceart agus gus casg a chur air cus teasachadh. Cleachd bruis bhog no èadhar teann gus duslach a thoirt air falbh.
7. A ’dèanamh trioblaid
Tha an earrann seo a’ dèiligeadh ri cùisean cumanta a dh’ fhaodadh tu a thighinn tarsainn leis a’ phroiseactair agad.
| Trioblaid | Adhbhar a dh’fhaodadh a bhith ann | Fuasgladh |
|---|---|---|
| Chan eil ìomhaigh air a thaisbeanadh |
|
|
| Tha an ìomhaigh blurry |
|
|
| Tha an ìomhaigh trapezoidal |
|
|
| Projector runs hot or smells of burning plastic |
|
|
| Gun fhuaim |
|
|
Nota Cudromach: This projector is not recommended for high-definition movie viewing. While it can accept a 1080p input signal, it projects at its native SVGA (800 x 600) resolution.
8. Sònrachaidhean
| Feart | Mion-fhiosrachadh |
|---|---|
| Modail Àireamh | IN112XV |
| Teicneòlas taisbeanadh | DLP |
| Fuasgladh Dùthchasach | SVGA (800 x 600) |
| Gile | 3800 Lumen |
| Co-mheas coimeas | 26000:1 |
| Lamp Beatha | Suas ri 15,000 uairean a thìde |
| Ceangalachd | HDMI, VGA (Computer In), Video In, S-Video In |
| Feart sònraichte | 3D - Deiseil |
| Cleachdaidhean Molta | Business, Education |
| Meudan toraidh | 8.8 x 12.4 x 4 òirleach |
| Cuideam nì | 5.5 not |
9. Barantas agus Taic
9.1 Fiosrachadh Barantais
The InFocus IN112XV projector is backed by a Barantas 2-bliadhnaTha am barantas seo a’ còmhdach lochdan ann an stuthan agus obair-ciùird fo chleachdadh àbhaisteach. Cùm dearbhadh do cheannach airson tagraidhean barantais.
9.2 Taic teachdaiche
For technical assistance, troubleshooting beyond this manual, or warranty service, please contact InFocus customer support. Contact information can typically be found on the official InFocus weblàrach-lìn no anns na sgrìobhainnean a tha air an toirt a-steach leis an toradh agad.