1. Ro-ràdh
This manual provides essential instructions for the safe assembly, operation, and maintenance of your Sealey IHS1 stand. This stand is designed to convert the Sealey IWMH1809R wall-mounted infrared heater into a freestanding IFSH1809R unit. Please read these instructions thoroughly before use and retain them for future reference.

Figure 1: The Sealey IHS1 stand with a compatible infrared heater installed, showcasing an dealbhadh neo-eisimeileach aige.
2. Stiùireadh Sàbhailteachd
Always observe the following safety precautions to prevent personal injury or damage to the product.
- Ensure the stand is assembled on a flat, stable, and level surface.
- Do not exceed the maximum weight capacity of the stand. This stand is specifically designed for Sealey IWMH1809R/IFSH1809R heaters.
- Regularly inspect all fasteners and connections to ensure they are secure.
- Keep children and pets away from the stand and attached heater during operation.
- Do not attempt to modify the stand in any way.
- When moving the stand with the heater attached, ensure the heater is switched off and cooled, and move with care to prevent tipping.
3. Pasgan-susbaint
Dèan cinnteach gu bheil na pàirtean uile an làthair mus tòisich thu air an cruinneachadh:
- 1 x Sealey IHS1 Stand Assembly (includes base, pole sections, and mounting bracket)
- Required Fasteners and Tools (if applicable, refer to heater manual for heater-specific fasteners)
4. Suidheachadh agus Seanadh
Follow these steps to assemble the IHS1 stand and attach your compatible heater.
- Cruinnich am bonn: Place the stand base on a flat, stable surface. Ensure the base is fully seated and stable.

Figure 2: The robust circular base of the Sealey IHS1 stand, designed for stability.
- Attach Pole Sections: Securely connect the pole sections to the base and to each other, following the instructions provided with the stand's packaging. Ensure all connections are tightened.
- Stàlaich an teasadair: Attach your Sealey IWMH1809R heater to the top mounting bracket of the IHS1 stand. Refer to your heater's instruction manual for specific mounting hardware and procedures. Ensure the heater is securely fastened and balanced on the stand.
- Riaghladh càbaill: Route the heater's power cable along the stand pole using the provided cable clips to prevent tripping hazards and maintain a tidy appearance.

Figear 3: Sealladh dlùth view of the cable management clip on the stand's pole, used to secure the power cord.
5. Stiùireadh Obrachaidh
The IHS1 stand provides a stable platform for your heater. Its primary operational feature is height adjustment.
- Atharrachadh Àirde: To adjust the height of the heater, loosen the height adjustment collar on the stand pole. Carefully raise or lower the upper pole section to the desired height (between 1340mm and 1700mm). Once the desired height is achieved, securely tighten the adjustment collar to lock the pole in place.

Figure 4: The height adjustment collar on the stand's pole, allowing for variable height settings.
- Suidheachadh: Place the stand with the attached heater in a location where it can provide optimal heating without obstruction. Ensure there is adequate clearance around the heater as specified in the heater's manual.
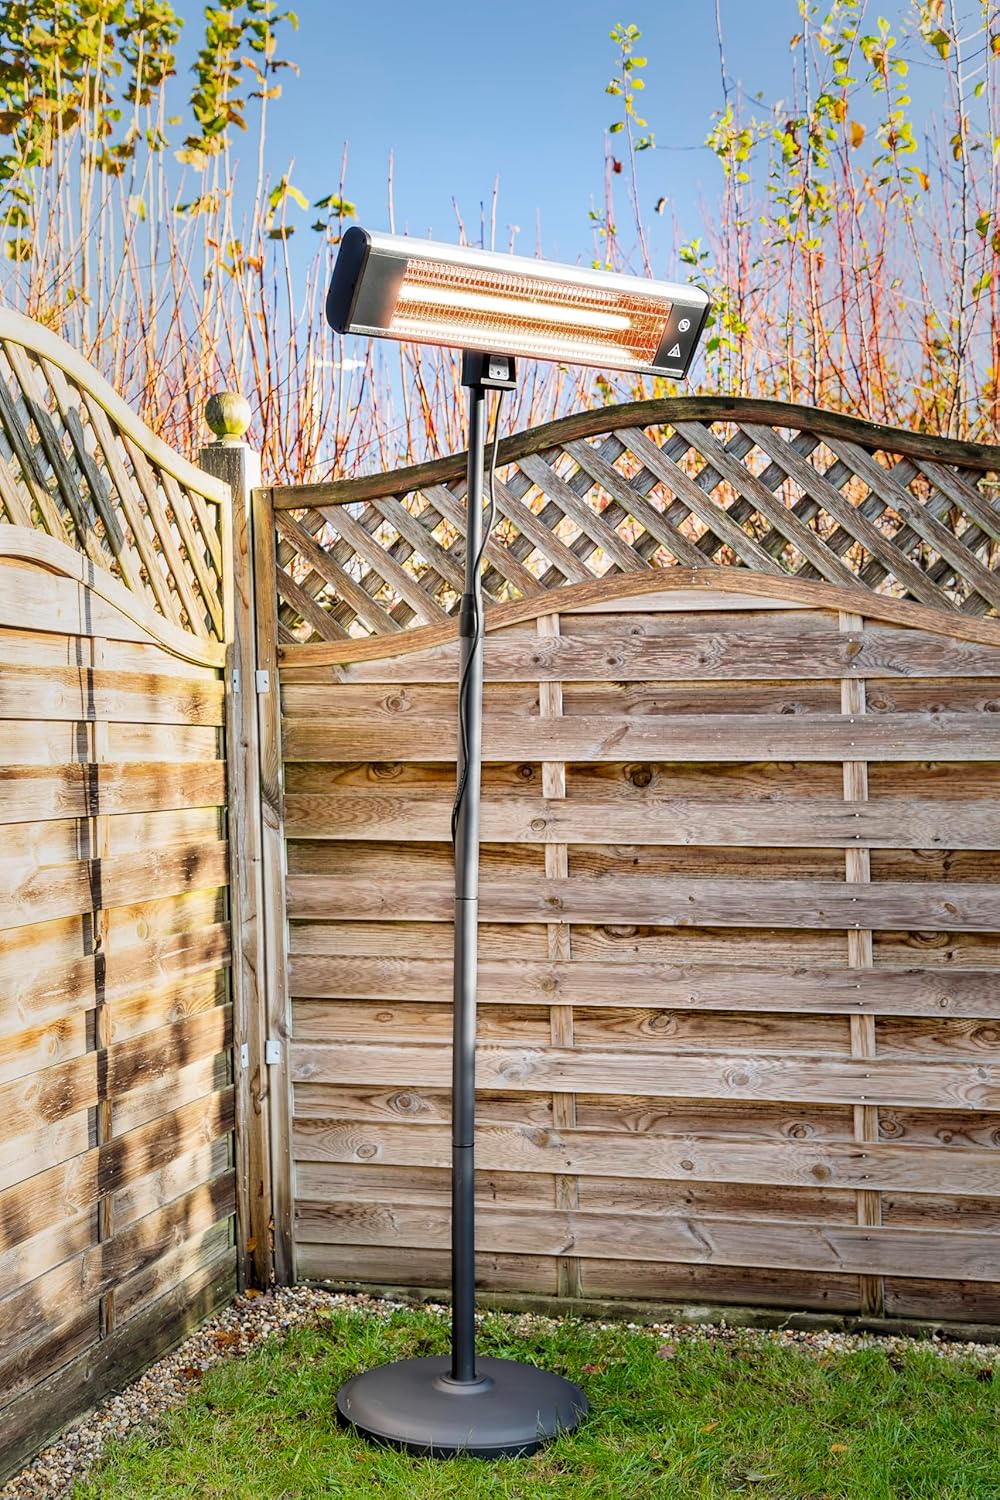
Figure 5: The Sealey IHS1 stand with an infrared heater positioned outdoors, demonstrating its freestanding utility.
Note: For specific operating instructions regarding the heater's power, heat settings, and sensor functions, please refer to the instruction manual provided with your Sealey IWMH1809R/IFSH1809R heater. An example of a heater control panel is shown below for reference.

Figear 6: Example of a control panel found on compatible Sealey heaters, featuring ON, OFF, and SENSOR buttons.
6. Cumail suas
To ensure the longevity and safe operation of your IHS1 stand:
- Glanadh: Sguab an stand le clò bog, damp aodach. Na cleachd luchd-glanaidh sgudail no solventan.
- Sgrùdadh: Periodically check all bolts, screws, and connections for tightness. Retighten if necessary.
- Stòradh: If storing the stand for an extended period, disassemble it if desired and store in a dry, protected area.
7. A ’dèanamh trioblaid
If you encounter issues with your IHS1 stand, consider the following:
- Neo-sheasmhachd Seasamh:
- Dèan cinnteach gu bheil an stand air uachdar gu tur rèidh agus rèidh.
- Verify all pole sections and the base are securely tightened.
- Confirm the heater is properly centered and balanced on the mounting bracket.
- Duilgheadas ag atharrachadh àirde:
- Ensure the height adjustment collar is fully loosened before attempting to adjust.
- Check for any obstructions or debris within the pole sections.
For issues related to the heater's functionality, refer to the heater's specific instruction manual.
8. Sònrachaidhean
| Feart | Mion-fhiosrachadh |
|---|---|
| Modail Àireamh | IHS1 |
| Compatible Heaters | Sealey IWMH1809R, IFSH1809R |
| An àirde as ìsle | 1340mm |
| An àirde as àirde | 1700mm |
| Product Dimensions (packed) | Mu 0.62 x 3.23 x 0.62 òirleach |
| Cuideam nì | 22.2 notaichean (timcheall air 10.07 kg) |
| Dath | Dubh |
9. Barantas agus Taic
This Sealey IHS1 stand comes with a Gealladh 1 bliadhna. For full terms and conditions, please refer to the official Sealey website or contact Sealey customer support.

Figure 7: Sealey's 1 Year Guarantee emblem, indicating product assurance.
For technical assistance, spare parts, or warranty claims, please contact your authorized Sealey dealer or visit the official Sealey weblàrach-lìn airson fiosrachadh taic.
Please note: "Terms and conditions apply" as indicated by the manufacturer.